Friday, November 30, 2012

Uh... yeah

When the phone rang, the guy on the other end sounded just a little apprehensive.
"G'day, this is Jason from Bowens - I'm out the front of the property, is anybody on site? This road looks like a fire break!"
I shot up to the road pretty quickly before he decided to turn around, and after a quick chat we both walked the 400m from the road to the house site, with he on the phone to his boss describing the dire condition of the "road" and me describing all the other trucks which have successfully made it to the site.

I may have neglected to mention the one who got bogged...

About 100m from the house site the road turns downhill, and about half way down Jason decided he wouldn't be able to drag his trailer back up the hill and started looking for clear spots at which he could unload. It turns out that since these guys mainly deliver trusses and timber to building sites in new housing developments, their trucks are "lightweight" with a single drive axle in order to avoid damaging council footpaths and gutters. Unlike just about every other which has made a delivery to us these trucks don't have diff locks, which would make the risk of spinning and slipping on our dirt track too great and since I have to sign off on the delivery before it begins, I'm indemnifying the driver against the cost of recovering his truck if he gets stuck.

I don't much feel like forking out $500 for a heavy tow truck today so I happily agreed that we'd drop the trusses as close to the building site as Jason felt comfortable.

So with that agreed, we fired up the truck and got started.

The first challenge was the turn into our driveway. As it turned out, not that big of a deal if you ignored the graunching and scraping of the trailer bottoming out...


The next obstacle was the 30º turn I was worried about. How does 12m + truck cab fit into a 9m length!?


With not much space to spare, as it turns out. I was there watching, and I still don't know how he did it but somehow Jason got his machine around it in one try.


Easy going from here on, then...


This is the point at which he turned the truck around!  There's not a lot more clear space here than is showing in the photo, but Jason swung wide, jacknifed the cab and turned the whole thing around in barely more than its own length. This guy knows his rig!


Now for the long reverse down the hill towards the building site. I had actually thought we agreed to unload the trusses reasonably close to the top of the hill, but as he came down Jason obviously felt confident enough in his truck to keep coming and so I kept my mouth shut. Every metre closer he gets to the site is a metre I don't have to heave these trusses and they don't look particularly lightweight.


In hindsight however, I do think I should have called a stop just a little earlier, before he ran his drive wheels off the road in chase of the trailer. At this point he tried moving forward and spun both his wheels; he tried going back a little and made it worse, nearly ripping his front bumper off in the process.

Looks like a good spot to unload, then.


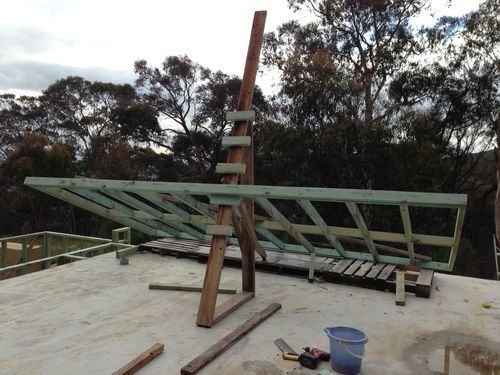
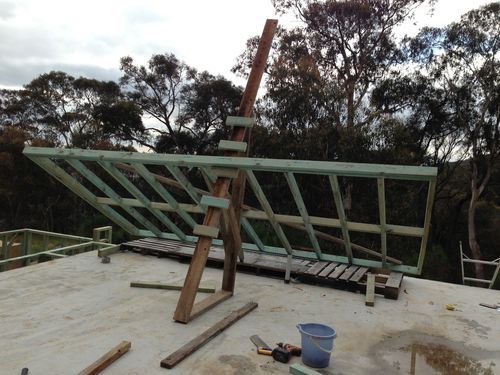
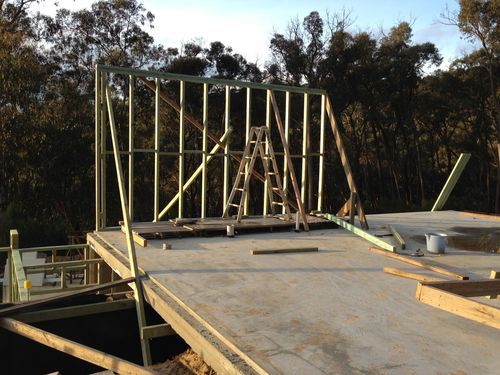
This spot is only about 30m from the top of the building site, which is actually pretty manageable. If the worse comes to the worst, I can heft one or two trusses on to the top of the Hilux and trundle them down the hill...

Unloading the truck took very little time at all really, and we were then left with the challenge of getting him back out again. Even without the weight of the trusses holding him back, there just wasn't enough traction in the loose topsoil and with his open diff, all we achieved was a hole deep enough to swallow the Mini.

Jason remarked at this point that he didn't really want to call his boss to tell him he was stuck, at which point I remarked that "You're not stuck until we give up, and I don't give up easily!" I've been here before...

I'm not sure it's common practice in the field of bogged truck recovery, but SL81 steel reo mesh offcuts under the drive wheels are the bee's knees. One sheet under the wheel in the biggest hole, and he drove out like nothing had happened.

To paraphrase Jason: "Golly!"


So with the drama behind us, Jason drove out like nothing happened. Graunching all the way (okay, maybe just at the end :) )


Truss transport

I got a call from the truss folks just now, confirming the transport details. It turns out they don't have a rigid crane tray big enough to take the trusses, so they have no choice but to send them on a semi-trailer.

I've never had a semi on the site, have I?

The largest truck so far has been a 9m tray and that was a close thing, so I have no idea how we're going to handle a semi with a 12m trailer.

The driveway track down to the house site is pretty easy going in a car, and plenty wide enough for trucks but gets a bit steep and loose right at the end. It's a bit windy too, with one bend I'm a bit worried about - I just ran up there with a tape measure and from the tree which marks the centre of the turn to the outside of the track is bang on 9m. I've relayed this to the transport guys and they don't seem too fazed by it...

We'll see. I don't reckon I'd try to drive a semi-trailer around here...

What rain?

It's been a really warm and humid night, and so far absolutely no rain - things are looking good for the truss delivery today.

I've got a few little details to wrap up before they get here - one top plate to install, a bunch of speedbrace on the external walls and the rest of my tie-down strapping so that will keep me busy until the truck arrives.

Thursday, November 29, 2012

It's an improvement...

"A little rain and the chance of a thunderstorm".

I haven't yet called off the trusses, and with any luck I may not have to...

Wednesday, November 28, 2012

Weather

I thought we were past this...

Friday: Rain at times and the chance of a thunderstorm (71% chance of 3-10mm)
Saturday: Rain at times and the chance of a thunderstorm until late afternoon (73% chance of 4-12mm)

Not to mention the forecast 39º maximum tomorrow...

Looks like I might end up calling off the truss delivery after all. Bugger!

Saturday, November 24, 2012

The home stretch

It was an early start this morning, and I can see my mornings beginning earlier and earlier as we get into summertime in order to beat the heat. I'm beginning to understand why tradies knock off at three in the afternoon... :)

First on the agenda today was to cut the timbers for the last wall sections. I was slightly more organised today in that I drew up my plans and worked up my cut list at the pub last night, so by 8:30 or so I was ready to start assembly.

The two lintel timbers to go above the window are heavy suckers, and I didn't fancy my chances of lifting the frame with them installed, so I assembled the window frame without them and lifted it up first.


Now, I've been looking at this window in my 3D model for months and months, but it's not until you put it together, stand it up and look at it that you realise that wow, this is a bloody big window!! I'm not entirely sure how I'm going to install the actual window in this opening; it'll be touch-and-go getting it through the door and there's a 2m drop on the other side!

A problem for another day, I think.

Next up, the lintel timbers:


These are pretty heavy lintels, so I'm really glad I assembled the frame without them. No way I would have been able to lift this section by myself otherwise...

The second-last frame section going together (sans top plate, I've learned that lesson ;)  ):


.. and finally, the last one.


A top plate here, a brace or two there and before you know it, we've got a building! :)


I'm absolutely thrilled to get to this point! I had hoped to get all the wall frames up before the trusses arrived, but to be honest I didn't think I'd actually get it done. With any luck now, the delivery driver will be able to lift the dwelling trusses onto the wall frames for me, which will save me a shedload of effort.

So next weekend I'll focus on finishing off all my tie-down requirements, install the rest of the permanent bracing, and fix all the frames down to the slab (currently they're all just sitting there). Oh, and just maybe I'll get distracted from that lot and take delivery of my roof trusses!

Friday, November 23, 2012

Lintel installation

So after spending most of the morning lifting top plates, I finally got into some real work again. First up, assembling the frame for the doorway, and notching the studs to accept the lintel timber.

The doorway timbers were easy to notch - I did them on the saw bench before I assembled everything; but I'd forgotten to notch the studs adjacent to this section into which the lintel extends, so I had to heft the circular saw up on a stepladder to do these.

I really must buy a little battery-powered saw for these jobs.. my Triton saw is awesome but it's a heavy bugger to wield freehand.

So with a little sweating and swearing and surprisingly few adjustments - measure twice, cut once - the doorway frame went up and the lintel slotted home easily.


The heat of the mid afternoon was starting to take its toll by this time though, so that's about where I left it. The last three sections to go tomorrow!

Lintels

I paid a visit to the Bunnings nearby my office earlier in the week, sussing out the price of the LVL lintels I need for the double doorway and window, both of which I hope to install this weekend.

My calculations show that I need a single 120x45 F17 lintel across the doorway, and two 190x35 F17 lintels nail laminated, over the window. Naturally Bunnings have neither of these sizes in stock, the closest being 140x45 for the doorway, and 190x45 for the window. Luckily, they have both of these in T2 treated LVL timber - Hyne apparently supplied them T2 stock in place of the untreated stock they ordered, so I'm getting the treated timber for the price of standard. Bonus!

Thursday, November 22, 2012

A little rework

To date I've been building my wall frames with the guidance of an old timber framing manual I've had lying around for years. This is a 1994 vintage Victorian Timber Promotional Council manual, and while I didn't expect very much to have changed fundamentally I thought it wise to check up on the most recent version of the AS.1684 standard just to be on the safe side.

Basically, I was right - very little of the fundamentals have changed in nearly two decades of timber framing, however the new manual (even the AS.1684.4 "simplified" standard) is quite a lot more detailed than the old and served to highlight one or two minor gaps in my knowledge.

Just as well I checked now, then ;)

The most serious error that I've made so far is that in choosing to use double top plates to my external load-bearing walls, I've failed to overlap their joints properly. This is a direct result of my building the frames in sections by myself - each wall frame section I've built separately, so I've ended up with a double butt joint in the top plates, which I had planned to join using gang-nail plates. This runs counter to the standard, which requires that they overlap by at least 1200mm.

Bugger. I've already strapped the top plates down, haven't I? So I'm going to have to remove the strapping, lift the top plates and stagger them so they overlap properly.

Not too big a deal really, and thankfully there's nothing else I've done counter to the code so I'll probably spend the morning on Friday sorting this out before I get stuck into the rest of the framing.

Monday, November 19, 2012

A short weekend

It was a short weekend this week, with only one day on site since Ewan had another swim meet in Melbourne. I got a little more framing done, with the linen cupboard at the end of the hall, the kitchen pantry and the first wall section on the northern side.


During the week I need to organize the two lintels I need for the door and window sections of the northern wall, so I can frame them up next weekend. With any luck I might be able to finish the frames for the unit, before the trusses are delivered on the 30th.

Wednesday, November 14, 2012

Lintel detail

Over the next couple of weeks I will get to framing the north facing wall of the dwelling. Unlink most of the rest of the framing, this wall has two quite large openings - one king sized window, and a double doorway out to the patio area which will extend out over the shipping container.

These two large openings require lintels, and because this wall supports a major roof load they need to be right :) With the help of my trusty old timber framing manual, I've sized and specified the lintels and incorporated them into the Sketchup drawing:


Both will be either F17 grade seasoned hardwood, or the equivalent LVL (laminated veneer lintel, a relative modern invention which builds up timber from what appear to be scraps left over by the milling process. They're probably not, but that's how they appear to my untrained eye ;) ).

So with this detail sorted (one which I've been putting off for a little while) I should be in a position to get the dwelling framing complete within a few weeks or so, hopefully in time for the truss delivery on the 30th!

Looking through the windows

I've spent some time re-reading the design specification which forms part of our building permit, and I think there's a little clarity in there regarding the window situation.

This document has already been reviewed and approved by our building surveyor, so I don't think there's any doubt as to what we're allowed to do - it's all written down and compliant with the building code for BAL-FZ:
Upper level windows: Fit double glazed windows of 12mm argon gassed, 5mm toughened, low-E glass in timber frames of Red Ironbark. Fit external 2mm steel flashing over timber areas.
Other windows: Frames of seasoned southern eucalypt (Tas. Oak, Messmate, etc) selected structural grade F17.
Other windows: Glazing to balance of laminated glass, single window glazing.

  • All opening windows and doors to have stainless steel mesh flyscreens, heavy aluminium framed with max. 2mm dia hole size.
  • Steel fire shutters to meet AS1530 8.2 to be fitted to all windows
I think that's pretty specific, and when talking to window manufacturers we're just not giving them enough information which leads them to ask for our BAL rating at which point they turn and run. If we ask for Red Ironbark frames with the appropriate glazing, we're all set and I can have the steel flashing made up separately (or I could always invest in a guillotine and pan brake and make them myself... :) ).

There are plenty of fire shutter options available, or we could even go down the path of roll-down fire blankets.


Tuesday, November 13, 2012

Windows in BAL-FZ

We've been investigating costs for the supply of BAL-FZ-compliant windows and doors over the past few days.

What a drama!

The problem with BAL-FZ is that very few companies have had their products tested to this level and when you mention that we're building to that standard, otherwise cooperative salespeople turn us away with a cold shoulder.

We've known for a while now that there's at least one company who can supply BAL-FZ-compliant windows - that's Paarhammer, and their "associated" company Sonneschutz who supply fire shutters. The problem seems to be that since they have a near-monopoly on this corner of the market, they can get away with charging Mucho Dollaro for their products - from memory, for our 17 windows and 3 external doors, we were looking at somewhere in the region of seventy thousand dollars (I had to type that in words because my keyboard ran out of zeros).

I'm not sure I can bring myself to spend that much coin on windows (read: we don't have it)... which leaves us with a dilemma.

I'm quite capable at carpentry and I know I'm able to build these windows myself - I made all the windows and our bifold doors in our current house - but the big question mark surrounds compliance with BAL-FZ. BAL-40 allows frames to be made from certain species of timber providing they're protected by steel flashing, but there's conflicting language in the code for -FZ. On the one hand it says that timber framed windows and doors are NOT PERMISSIBLE (their caps, not mine), but then elsewhere it says that windows which comply with BAL-40 can be used in -FZ when suitable screens and shutters are fitted.

That aside, I'm still in the dark as to whether I am allowed to make these myself and comply with the code, or whether I'd have to have a window of my design tested by CSIRO.

Hmmm...

Monday, November 12, 2012

Because I don't already have enough to do...

... I thought I'd test drive a new host for the blog. A couple of reasons:

  1. Tumblr, where the blog has been hosted until now, has no export or backup options available. I had to jump through significant hoops to import all my posts over here, but at least Blogger has good export and backup features.
  2. I really like Blogger's tree-style navigation, over there to the right --->
  3. I felt like it was time for a change :)
We'll see how this works out. I'd be interested to hear feedback on the new layout, etc.. if you feel so inclined :)

A few more frames

Only one day on site this weekend, but with the first couple of sections’ timber already cut last week, the framing flew up :)


First up - the built-in wardrobes which divide the two bedrooms:


Next, the rest of the hallway wall:


And finally the rest of the rear wall.


Coming together nicely! Next weekend I should be able to complete the rest of the perimeter, once I figure out what lintels are needed above the doorway and b-i-g living room window.. and in two weeks I reckon I can have the dwelling frames all finished, just in time for the truss delivery :)

Thursday, November 8, 2012

Trusses!

I got a call from the truss manufacturer today to confirm the order details. Turns out their quote didn’t allow for manufacture from T2 treated pine, so there’ll be a small variation to the price by a couple of hundred dollars.


When I put the spec document together I sent it off to two manufacturers - Bowens (who use/own TimberTruss in Geelong) and Dahlsens in Shepparton. Would you believe, Bowens were over $1000 cheaper than Dahlsens, coming in at $3100, including all the hangers, x-grips, braces, noggins and the rest. So even though it’ll come in at closer to $3400, I’m still pretty happy.


I asked Peter the other day to guesstimate what he thought the trusses would cost, and his guess was $10 grand. Three-and-a-half is looking pretty good :) 


So the upshot is that I have a delivery date - November 30th. Now I’ve got a target to work towards to get the wall framing done…

Tuesday, November 6, 2012

That'll do

As you can see, the weather turned against us just a little bit this afternoon, so although I got the timber cut for several more frame sections, only one (and a bit) made it vertical.


OK, so the fact that the family and a few friends came up for a BBQ lunch may have had something to do with it… ;)


So that’s it for this weekend. Bring on next weekend!

Monday, November 5, 2012

Video

This was the first frame to go up today.


More good progress

We kicked off the morning by working up a cut list for the next two frame sections. These are perhaps the largest and most complicated in this part of the build - the main hallway frame incorporating two doorways and the bedroom outer frame which has two windows. There were lots of small fiddly lengths involved so it took a couple of hours before I fired up the generator to begin cutting.


By lunchtime we had all the cutting done. Again, Rhys was an absolute ripper of an assistant, getting the hang of the routine quickly and even starting to anticipate what he needed to do next. Not bad for an only-just-7 year old! :)


Both of these frames went together really smoothly, with only a couple of mistakes in the cut list requiring the dreaded chug-chug-chug and stink of the generator.


Lifting the first frame into place went pretty easily, too. I’m beginning to wonder what all the trouble was with the first one.. maybe the timber was a little wetter or something, because it’s not all that much bigger but boy was it heavy.


With the first one fixed off and plumb, the second went together pretty quickly although by this time both of us were feeling a little weary so our pace slowed a little ;) Once we got it stood up and clamped in position, I sent Rhys off to play on the iPad for a while, while I plumbed and fixed it in place. Poor little guy was stuffed, and well deserved a break with a few games!


So that’s about as far as we got today. We’re pretty close to finishing the bedroom framing off, which may or may not happen tomorrow with the weather threatening mutiny and the rest of the family coming up for a Cup Day BBQ. Either way I’m stoked with our progress, it’s just fantastic wandering around the bare frames seeing the 3D model come to life :)

Sunday, November 4, 2012

More framing

It was an early start this morning at sunrise, for a mad dash back to Melbourne to run the boys’ regular Sunday morning swimming encouragement meet. A while back I made a rod for my own back by “streamlining” the registration, handicapping and timing of the meets which means that I’m an essential part of their running until I can get some others trained up on how all the systems work. All good fun, though and the kids love it.


As soon as that was finished I made another mad dash back up to the building site, this time with Rhys as a tag-along. It seems lots of Victorian schools have scheduled a “curriculum day” tomorrow, in no small coincidence I’m sure with the Melbourne Cup Day public holiday on Tuesday, all of which means the boys have no school tomorrow.


I really do genuinely enjoy having Rhys come up to help, though. He always wants to be involved and is genuinely helpful, and he’s certainly learning a lot about the building process and he can proudly claim that he built this house with his dad :)


Here he is measuring the diagonals of one of the frames to make sure it’s perfectly square. Good lad! :)


In no time flat we had the first frame assembled and upright. This one was only a little shorter than the first which nearly killed me erecting it, but surprisingly I was able to heave it upright fairly easily without aide. I put this down to the double top plates of the perimeter walls; that extra 4.6m or so of timber put it over my weight limit I think.


It didn’t take that long to place and plumb this wall, thanks to it being just about perfectly square and so with an hour or so before dinner and having all the timber cut ready we decided to assemble the next frame.


Voila, it’s almost a bathroom! :)


The plan for tomorrow is to make up the frame for the hallway, and then those for the bedrooms. If I can get this half of the dwelling done (leaving just the kitchen, and the perimeter frame for the living area) by Tuesday I’ll be a happy man! :)

Saturday, November 3, 2012

Frame #2


It struck me this morning after I assembled the second frame that I’ve forgotten something. The load bearing external wall frames need to have the top plates tied to the bottom plates, which in turn are bolted to the slab. This means the roof trusses, when they’re fixed to the top plates, cannot lift and leave us roofless. The way this is done most simply is with steel strapping, or “hoop iron” looped over the top and bottom plates and nailed to the studs.


Don’t have any of that, do I?


Off to Seymour, then.. better that I get it now and affixed to the frames before I put them up, otherwise it’ll be a bugger of a job doing it later. (There may also be a hint of procrastination here too, this frame is even heavier than the last one and that one nearly killed me yesterday…)


In a stroke of beautiful luck, I caught Peter coming back up the hill on my way back - he was stopping by to pick up his timber we used boxing up the slab and between the two of us we got this frame vertical and in place in only a couple of minutes - a far cry from the three hours it took me yesterday!


The rest of the afternoon was spent nailing (with a hammer, of all things.. pah!) the straps into place, and then measuring, marking and cutting the timber for the next two wall frames. These will be the second wall alongside the stairwell / bathroom, and the other bathroom wall.

Friday, November 2, 2012

What do we have here...

So the first order of business today was to get a look at this slab we’ve poured, which has been curing nicely underneath the plastic for a couple of weeks.


Ta-da!


All the edge rebates are nicely formed up and crisp, and the surface looks pretty level with no major low spots (save for the around the shower drain!) Happy with that!


I’ve decided the first job for the weekend will be framing - nothing like making visible progress to stir the motivation! With this in mind, I need to make the stairwell opening safe - I can’t leave it open while I’m working around it, otherwise I’ll find myself doing my best Wile E. Coyote impersonation, complete with YIKES! sign.


Enter the humble shipping pallet…


I’ve got a stack of these on the site, they’re the most useful thing! I take the boys out in the Hilux on a Sunday afternoon occasionally and drive around the industrial areas around Yarraville and Williamstown, looking for abandoned pallets. Even now the kids will spot them for me whenever we’re in the car :) So these ones I’ve pinned to the frame below through the opening, using scrap bits of timber so they can’t move. Now at least I feel like I can walk around safely :)


A couple of hours on the bench saw later, and I have all my studs, top & bottom plates and noggings ready to go for two frames - the first being directly behind the stairwell opening, and the second at right angles to it forming the outside wall of the bathroom.


A few minutes with the nail gun (have I mentioned how much I love this tool!?) and…


One frame!


… and a slight problem. The little frames downstairs I was able to lift and move largely by myself, but this one is 4.6m long and 2.7m high, and must weigh 60 or 70 kilos, too much for me to lift upright without assistance. Well, I don’t have an assistant on hand today, so a little ingenuity is in order.


My first idea was to use multiple “legs” attached to the frame which would swing to the vertical as I lifted the frame up, but I didn’t have the right lengths of scrap timber (and I don’t want to cut up my framing lengths) so I moved to plan B.


Things got a little hairy at this height, as the frame wanted to slide off the pallets. I kept it from falling over the edge with a few blocks nailed to the pallets, and then used a few swinging leg props to get up towards vertical. It sounds a lot easier in words than it really was…


Things remained hairy as I got the frame vertical, as I had to get it off the pallets and onto the slab without having it slip over the edge. It took plenty of slow, careful thinking and one absolute monster prop to stop the frame tipping over beyond vertical but in the end it’s in the right spot.


So that’s it for today - tomorrow’s focus will be to get the second frame up!