Wednesday, February 29, 2012

A solution to the lintel problem

I’ve been putting off thinking about the solution to this problem for a little while, instead focussing on more immediate jobs but tonight I sat down again in front of Sketchup and resolved the construction detail of the door opening in the rammed earth wall.


There are a few design constraints in play here - the walls must incorporate a control joint at no more than 3m intervals, and the section above the door must be supported by a galvanised 100x100x10 angle lintel. I’ve been thinking about how to build the walls and incorporate the lintel, and I’ve finally come up with the solution.


When I ram the panel to the right of the door opening, I’ll incorporate a 430x100x150 timber block at the top of the form, in order to leave a rebate in the wall.


I’ll do the same for the panel on the other side of the door opening, and into the resulting rebates I’ll install the lintel.


Then I can prop a form panel under the lintel, set up my forms above and ram the infill above the door.


This method seems bleedingly obvious and trivially simple to me now, but for a while there I had no idea how I was going to do this part of the wall. I had to sit Alissa down in front of the computer and show her the problem, explaining what we needed to achieve for the light bulb moment to occur :) I always find it amusing how the solution to a problem will magically appear when you explain the problem from first principles to someone else :)

Tuesday, February 28, 2012

Tamper arrival!

The rammed earth tamper arrived today from the US. Looks like a solid, strong unit - now I’ve just gotta figure out what fittings I need to hook it up to the Monster Compressor :)

Monday, February 27, 2012

A little load off

Spoke to the building inspector this afternoon to find out what he wanted to inspect with this retaining wall. Someone mentioned recently that their inspector wanted to see every piece of rebar wired into place, which when you’re building a concrete block wall basically means they have to be there to watch you build it, as there is rebar every other course.


I was starting to get a little bit worried about this, but thankfully our inspector is a little more pragmatic about it - after I explained how the wall is being built and with what reinforcement, he’s agreed that they only need to inspect before it gets core filled with concrete grout as he’ll be able to see enough of the reo to confirm that I’ve done a good job :)


That’s a relief.. it means I can just get on with it! :D


(Now, let’s hope the site hasn’t washed away in the downpour today - the Hume Freeway was underwater at Tallarook, which means there was a lot of rain!)


(picture courtesy Leigh Mason, an Instagram user who happened to tweet about it as they drove by!)

Sunday, February 26, 2012

What's the one after entree called?

So this morning I got stuck into laying the second course, expecting this one to fly by but .. it doesn’t matter how careful you are and how many times you check the level, something always stuffs up. Quite a few blocks in the first course had shifted ever-so-slightly (probably when I set the block next to them) so I ended up adjusting the level and position of the second course tirelessly.. it probably took between 5 and 10 minutes to lay each block by the time I cleaned the beds of debris, placed the block, checked the level, tweaked the level with plastic wedges, checked again, adjusted the block next to it, checked again, etc etc.


Good result though:


I also used up my stock of N12 rebar to place and wire most of the extended vertical stems. I’m not looking forward to having to heft the blocks 2m into the sky and over these bars next week though… gym? Who needs a gym?


In other news, this behemoth showed up, another eBay score:


It’s bigger than it looks in the photo - the tank is about 1.2m long!! 15 HP petrol motor, 42CFM free air delivery (not sure I believe this, but we’ll find out in a few weeks) and loud!! I don’t think it’s going to struggle to supply my rammed earth tamper…

Friday, February 24, 2012


First course is done!! Finally! I think I’ll have a cider to celebrate :)
Pretty happy with the position of the container end of the wall too - not more than 20mm from the end block to the edge of the slab.
There is one problem to resolve however - someone (i.e. me) placed the footings for the container too close to the cutting wall, so one container door is going to foul on the retaining wall and not open very far. Not too big a deal, as ultimately I’ll just remove it.


The day is really starting to heat up, but why suffer unnecessarily? :) This way my mortar should last a little longer too!


First half of the first course is done, much happier with the position of the blockwork vs the rebar this time. It’s the old lesson: measure twice, cut (or in this case lay) once ;)

Blockwork, round #2

Ugh, 36°C forecast today. This is going to make laying mortar a fun job, I might have to mix smaller batches so it doesn’t go off before I can use it. It’s only 10am and you can really feel the heat potential of the day… So far the day is going to plan, I’ve removed the first 2/3 course of blocks and figured out my new starting position in order to avoid fouling the rebars. A Vegemite sandwich, a banana and a coffee are in order, then it’s mortar time!

Thursday, February 23, 2012

More steel

I ordered the steel reo for the rammed earth wall and the upper slabs today. I was hoping to get the wall mesh supplied galvanised but it appears to be unavailable so I’ll have to get this done myself.  That, or I’ll rope the boys into painting it with cold-gal :)


One thing I found interesting today - when we ordered the steel for the garage slab in January, I used a supplier in Shepparton who was recommended to me. They easily beat any prices I could find online, so it was a bit of a no-brainer.


Then the steel showed up on a truck from a different company, and the driver suggested that next time I should give them a call directly rather than the Shepp guys, as they’re the wholesaler and could give me a better price. I thought that was ethically questionable, but my curiosity got the better of me and I did contact them for a quote this time around.


They were $600 more expensive than their reseller! It goes without saying that I’ll use the Shepp guys without second thought next time. I should also find out what else they can supply me, since they appear to have a very sharp pencil :)

Sketchup rules, honestly

After deciding on the layout of the rammed earth wall, I’ve been thinking long and hard about how to build it. This has involved some discussion with Bluey from the BYOHouse forum, who has nearly completed his rammed earth home and has some fantastic insight into the construction methods.


My first concern with the wall construction was the formwork. My little test “wall” taught me a few valuable lessons:


  1. The forms cannot be too strong.

  2. They need to be anchored securely to the ground, and kept absolutely plumb.

  3. Thought needs to be paid to their ability to stack, or at least be raised as the wall grows in height.

  4. Did I mention they’ve gotta be strong?

I have been considering ways to anchor the formwork to the slab, but I really don’t want to place temporary fixtures in the surface. I mentioned this to Bluey and he described in detail how his forms were built, and how he anchored them. In his case he had strip footings to clamp to, but since I don’t have these he suggested fixing them internally using steel angle. I had been wondering how to use the steel rebar which will be set in place to anchor them, but the steel angle idea is so much simpler and really quite neat as they remain in the wall permanently, and will be largely invisible when the walls are complete.


In any case, rather than reinvent the wheel I’ve decided to base my form designs on Bluey’s, which have been proven to work and produce a good result. One aspect of his design that I particularly like is that there are no through holes in the surface of the wall for the bracing rods, since they pass through the control joints instead. This means that there are fewer obstructions to ramming the earth, which when the wall is steel reinforced is a blessing as there’ll be enough in the way as it is.


With all that in mind, here’s how I’ll go about it.


First, I’ll fix two lengths of steel angle to the slab using dynabolts, precisely 2m apart. These will anchor the formwork columns securely to the slab.


Next, the full height end columns will be bolted to these brackets. The columns are constructed with bracing props in order to plumb the column perfectly. Timber wedges will be used under each “foot” to trim their position and get the columns perfectly vertical. Each column has internal chamfers to produce a nice corner to the wall which will also prevent them being damaged when the forms are removed. It’s hard to see in this picture due to the scale, but the left-most column also has a “tongue” along its length which will form a control joint for the next panel to mate with.


Once the columns are perfectly plumb, the form panels will be attached and bolted up. These are designed with plenty of bracing to prevent them from bulging in the middle but I’ll have to wait and see whether or not they’re strong enough. I think a full-scale test wall may be in order…


Earth is then poured into the forms and rammed in layers of around 15cm. As the wall grows, another set of forms are added above the first until the wall is complete.


Once it’s full height, the forms are removed revealing a beautiful wall panel :)


The forms are then reset, leaving a 2m gap and another panel is rammed. The gap between the panels allows the forms to be clamped against both sections without needing the columns to fill in the gap.


I have to give credit to most of this process to Bluey on the BYOHouse forums. It’s only been a week since I signed up there and he (and others there) have shared such a wealth of knowledge and experience and I’m a total stranger! With any luck I’ll be able to contribute my fair share in the next few years too :)

Tuesday, February 21, 2012

More 3D work

After discovering (well, more .. experiencing) that things don’t always work in the real world they way you expect them to in your head, I decided to spend some more time in Sketchup and plot some of the finer details of the work I’ll soon be undertaking.


One of the things I’ve been doing is going over in my head the different methods for forming up and constructing the rammed earth wall. Having never done this before and only really getting one chance to get it right, I’ve been doing a lot of research and reading into rammed earth projects that others have undertaken. I found one such project over on a forum that Terry commented on a few posts ago, BYOHouse. This is a fantastic little forum, very low traffic but the folks there are real Aussie owner builders and share some absolute pearls of wisdom. Alissa had pointed me at this as well some time ago, but my memory being what it is I discovered it again for the first time.


Anyway, Bluey’s build and methods have struck a bit of a chord and I’ll probably emulate some of what he’s done building his walls. Since our engineer has specified that we have to install control joints (to allow the wall to expand and contract without cracking) at no more than 3m intervals, I’ve decided to build the wall in 2m panels:


This will allow me to attack the wall piecemeal, perhaps one panel per day (or more likely, weekend) without needing to enlist a small army of volunteers to get it done.


My first priority though is to get the blockwork retaining wall done. I’ll have to have a close look at it when I’m there again on Friday, but after doing some more modelling I get the feeling I may have to remove the blocks I’ve already laid and start again, this time laying the first course out dry before I commit to their position with mortar in order to ensure I maintain clearance with the rebars. Oh well.. live and learn…

Sunday, February 19, 2012

3D!

Shortly after Peter drew up our working drawings last year, I started work on a 3D model of the garage & unit in Google’s free Sketchup tool.  This is a brilliant program, not quite CAD but brilliant for conceptualising pretty much anything in 3D.  Google use it to model cities in Google Earth, to give some depth to their 2D satellite imagery.


Anyway, the process of drawing up the design has been invaluable - I’ve managed to spot a couple of details in the design which look fine on paper, but don’t quite translate to something structurally intact in the real world.  One example of this was the upper suspended slab - because we have the stairwell in the corner of the slab, one portion of it was effectively unsupported and cantilevered over the concrete block retaining wall.  Not good :)


The great thing about producing the model is that I can catch these little gotcha’s before we get anywhere near making the mistakes on site where they’ll cost $$$ and time. It also allows me to produce accurate estimates for materials too - I can visibly see how many Hebel panels we need, how much timber framing we’ll need, etc. meaning with any luck we’ll save some money by ordering only as much material as we’ll need.


Anyway, pictures tell a thousand words:


This is where I’ll be spending most of my time (with any luck!)


A kookaburra’s eye view of the unit from behind, overlooking the patio above the shipping container.


A few layers stripped back, showing the roof construction. The jack trusses and rafters in the garage not only provide a good up-and-over profile for a passing fire front, but conveniently I gain some clear space under which to install a two-pillar car hoist, for working on my Minis (and the odd Hilux).


More roof stripped away above the unit, showing the floor plan. On the south side of the building we have the two bedrooms and bathroom, then a central rock wall for internal thermal mass in the living space. The eastern-most part of this area will initially be fitted out as a kitchen, but thanks to planning regulations this will be removed once work is completed on the house proper, in order to classify the unit as dependent on the house and not self-sufficient.


This one shows the ground floor layout. At the front of the building we have the pump room, which will house our petrol fire pump which will also be used to pump water from the collection tank(s) around the garage, up to our main header tank at the top of the hill. We’ll do this every couple of weeks, primarily so we know we always have a working fire pump - so many stories emerged from the Black Saturday fires of fire pumps failing through disuse that we’re not going to fall into that trap.


Beside the stairwell will be our power room, housing batteries, inverter and controller for the solar system.


Behind that is a clean / wash room, so we have somewhere away from the dust and grime of the workshop.  Then the container, which will serve duty as a store room.


Saturday, February 18, 2012

Blockwork, round #1


As planned, an early start this morning saw a start on the first course of blockwork for the retaining wall. I have to admit a little trepidation at first - I’ve never mixed mortar before, let alone laid bricks or concrete blocks. The fact that this wall is a crucially important structural member in the building had me a little .. not nervous, but let’s say cautious.


I’ve always held the belief that “I can do that!” when it comes to hands-on stuff, and this was no exception. All it takes is a little careful research and learning beforehand, which in the case of this masonry wall involved the Boral Masonry Design Guide and the CMAA Concrete Masonry Handbook. What’s interesting (and something I didn’t know) is that clay bricks and concrete blocks have different properties in that clay bricks will tend to expand after manufacture, while concrete blocks will tend to shrink. Therefore brick mortar is different to block mortar - brick mortar made with “brickie’s loam” will shrink as it dries, matching the expansion of the bricks. If this is used with concrete blocks, it’s likely to crack.


Just as well I did the research ;)


With recipe in hand (or mind) I mixed up 1 part cement to 4.5 parts concrete sand with 0.5 parts lime in a wheelbarrow, being careful to mix the ingredients thoroughly dry before adding water. To my mild surprise, I did a pretty good job at it and the result was a pretty great mortar, if I do say so myself :) I was worried it was going to go off quickly (memories fresh of the concrete slab and the more recent chem-set epoxy..) but I got over an hour out of the first batch before it started to go stiff. Just as well, because my first few blocks were slow going until I learned the tools and the technique :)


Progress was pretty good, my technique improving all the time. It took about two hours from the first ingredients hitting the wheelbarrow until I used the last of the batch, and about a third of the first course was complete!


Sadly, from there things started to slow down a little. Each block is precisely 400mm in length, and the reo bars are set more-or-less 200mm apart (some are slightly more, some slightly less). However, it’s pretty impossible to place each block in its allotted 400 ± 0mm space, so over the length of the wall the clearance between the bars and the webs in the blocks started to shrink until a little creative problem solving was required. This, coupled with the increasing heat of the day meant my second batch of mortar went off after laying fewer blocks, so half a barrow went to waste. It was always going to be a short day anyway with the boys’ swimming comp to attend, but it meant that I’m about half a dozen blocks short of a full course (if there’s a better euphemism for my state of sanity, I don’t know of it :D )


No matter, it’ll be there waiting for me next weekend…


Friday, February 17, 2012

The lesson for today...


… is “Use the right tool for the job”. This will become apparent a little later…


For the eastern-most retaining wall which supports the upstairs suspended slab, our engineering drawings specify a 300-wide concrete cavity wall, reinforced with SL918 mesh. For the life of me, until earlier in the week I couldn’t figure out how this was going to work. Firstly, concrete blocks come in 190 or 200 widths, not 300.. and there would be no way possible to install the blocks with steel mesh reinforcement. I pawed over the spec and the working drawings for ages, but couldn’t figure it out until I finally realised that the drawings were specifying two skins of 90w concrete bricks with a 120w cavity between, which would be filled and reinforced.


For some time, Peter and I have been discussing the use of a Boral concrete block product, Connex, to build the retaining wall. This is a dry-stack system, in which the first course is mortared to the slab but then the blocks are just stacked like Lego and when the wall is complete, filled with concrete grout. This is much easier for a complete novice like me to build (correctly), so this is the way we’re going.


So, during the week I ordered the concrete blockwork. I tried my hardest to buy the Boral Connex product, but of the three closest Boral suppliers I contacted, one had never heard of Connex, one wanted to charge me a fortune and the other supplied a competing product from Adbri, called Versaloc.  These were lots cheaper than the Connex, and they could deliver on Friday (today) so they got the nod. Both Adbri and Boral supply detailed technical manuals for building with these blocks, specifying reinforcement and fill requirements for different use cases - one of which is a “basement” retaining wall, fully propped by a concrete slab floor above.  This neatly describes exactly what we’re doing with this wall, so I’m going to deviate from our plans and build it to their spec. I don’t think the building inspector will mind……


So today, my day started with a plan. This was:


  1. Form up a little earth ramp up to the slab, so it’s easy to drive the bobcat (or the Hilux, or other equipment which may or may not be delivering concrete blocks) up onto it.

  2. Set up a string line, find the right level for the first course of concrete blockwork, and figure out the layout.

  3. Drill the holes needed for the additional starter bars (when we poured the slab, we should have cast in ligatures at 200mm centres for both this wall and the western rammed earth wall, but we didn’t have enough. Hence we set them at 400 centres, and will chem-set N12 bars in at 200 centres).

  4. Cut the starter bars and chem-set them into the slab.

  5. Lay the first course of blockwork on a mortar bed.

Like all good plans, this one went out the window reasonably quickly. Things started well enough as I managed to get the ramp formed up and compacted nicely, using the Right Tools For The Job - the bobcat and whacker, both cheap scores on eBay. I got my level sorted out and figured out what holes I needed to drill, but that’s where the day started going downhill.


Several years ago I bought a cheap Ozito hammer drill and had planned to use this to drill the holes for the rebar. It managed the first two OK, but then the variable-speed trigger started playing up and it completely failed part way through the third hole. Did I mention I have 34 holes to drill? This patently was not the Right Tool For The Job.


I needed to make a trip into Seymour anyway to pick up the chem-set (an industrial-grade epoxy resin) to fix the bars into the slab, so while there I stopped by the hire place and grabbed a rotary hammer. This was a very good thing - the Right Tool For The Job! :)


Shortly after I got back, this lot arrived! :D


Five hundred and sixty concrete Lego blocks :)


Drilling the 34 holes in the slab however took quite a bit longer than I’d hoped, and it was 4:30 before I was able to start setting the bars into place. The epoxy for this comes in a caulking-gun tube in two parts, which are mixed in a funky nozzle when dispensed. Each hole didn’t need much, but wow does this stuff go off FAST! I initially filled about 10 holes, then went back and hammered the bars into place but by the time I’d done that, the epoxy had set hard in the nozzle. Luckily the tube was supplied with two nozzles, so I changed it over and learned my lesson, only setting two or three bars at a time before dispensing more epoxy.


An hour or so later, and voila!


All set now to start laying the first course of blockwork in the morning :)


Rammed earth, one week on

So my little rammed earth test wall/block has been in place for a week, covered with plastic so it was out of the weather.  Time to see how it looks!


Although it’s lightened a little as it’s dried, I’m still not thrilled with the colouring.  The natural soil is a rich orange-brown which would make a beautiful wall but with the grey cement and grey sand, the colour is dulled considerably. When we come to ram the walls for real I’ll try and source some off-white cement and yellow brickie’s sand, which should result in a colour more closely matching the natural soil.


What’s interesting is that as the block has dried, the cracks have developed a little more. The one which was caused by a dry patch in the mix has grown slightly, but new cracks have opened up at the base. My suspicion is that this is due to the relatively high clay content of our soil, and that I mixed it two-to-one with sand which has caused it to shrink a little too much as it’s dried. I think I’ll need to ram another test block with a higher percentage of sand, and perhaps raise the cement to 8% or so. All good learning! :)


This one highlights the need for a good, even mix too… I really must invest in that cement mixer :)


Wednesday, February 15, 2012

Pogo sticks at 20 paces

Since ramming my little test “wall” and getting the nod from the engineer, I’ve been (OK, well Alissa has been) looking around for places to hire a pogo stick (pneumatic earth rammer), since ramming a 9m by 2.5m high wall by hand would be murder.


Most mainstream hire shops look at you funny when you ask for these - the only earth rammers they seem to know about are the petrol-powered “foot” rammers which you see council workers using to compact crushed rock for concrete footpaths.  Alissa did however manage to find one place in Airport West which deals a lot with rammed earth builders and have the rammers available, for a pretty reasonable $40/day.


Thing is, I can have one on eBay for $450 delivered, which admittedly is more money but only 11 days hire. If I was certain that I’d be really well organised and have the wall built in a single (long) weekend then I’d just hire it, but things never work out to plan and so we’d probably spend half the bought cost just to hire one.


With that in mind and one late eBay bid later, we’re now the proud owners of our very own pneumatic tamper! :) My rationale is that even if we don’t get the use out of it to justify the expense versus hiring, we can at least on-sell it later and probably get most (if not all) of our money back since these things retail for $1800-or-so locally.


Now, all I need to do is sort out an air compressor man enough to drive it.  My little 40L workshop compressor isn’t nearly big enough for the job (the tamper can consume 30cfm at 90psi), so either I hire a big petrol compressor when we need it ($60/day) or it’s eBay to the rescue again…


Monday, February 13, 2012

Engineer's approval :)

I finally got the official approval from the structural engineer yesterday that we’re clear to use rammed earth for the internal load bearing wall! :)


His calculations suggest we’ll need to use SL918 steel mesh centrally inside the wall as reinforcement, but we’d need that (or equivalent) in a concrete block masonry wall anyway so there’s no surprise there. So it’s full steam ahead!


I hope to order the masonry (Boral Connex, dry-stacked concrete blockwork) for the retaining wall in the next day or two, with any luck for delivery on Friday when the plan is to get a full complement of ramming forms built up, and keep all my fingers firmly attached to my hands…


The other imperative is to find a pneumatic rammer, to hire cheap or to buy (cheap ;) ). There’s currently one on eBay I have my eye on in the US which I could have delivered for AU$450, so if it looks like the hire cost for the duration will approach that sort of money, I’ll just buy one and on-sell it later.


(Oh, and I feel I should give our engineer a bit of a plug here:


Knows his stuff, and provides awesome service :) )

Saturday, February 11, 2012

Rammed earth!

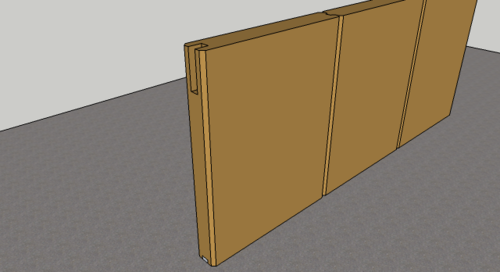
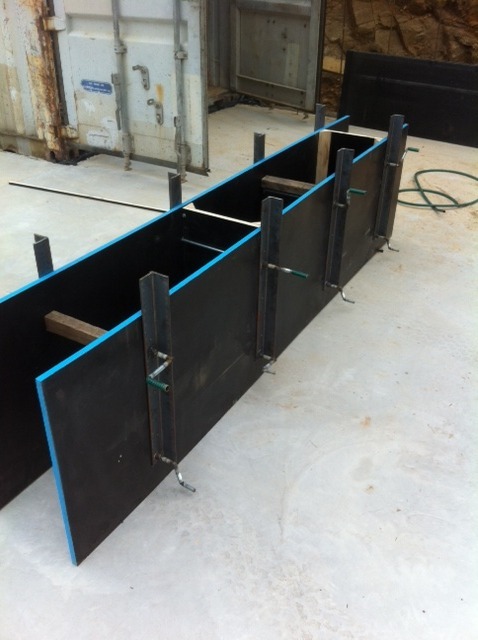
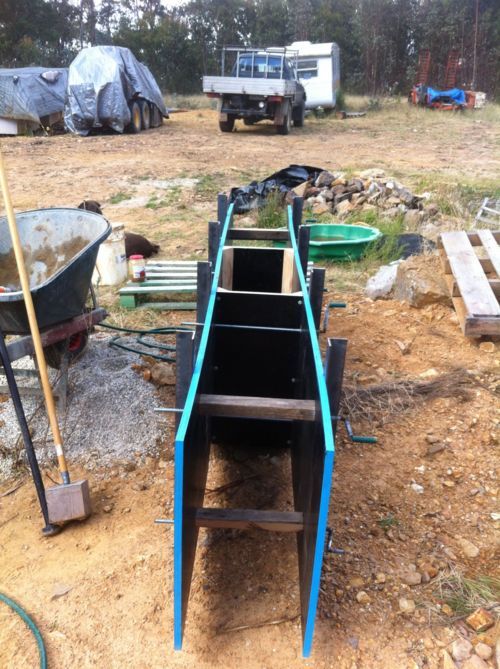
Made an early start to the day this morning, with the first cab off the rank being to get a test wall rammed.


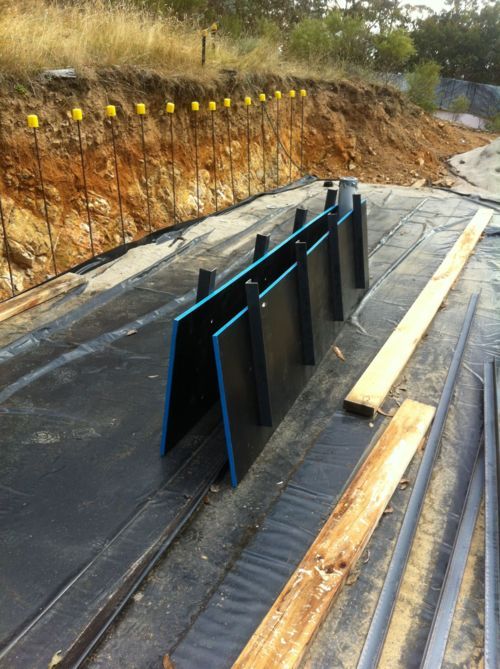
The first challenge was .. where to put it? Aside from the slab, there’s very little level ground on the site which is out of the way, so in the end I just dropped the forms near the big pile of soil.


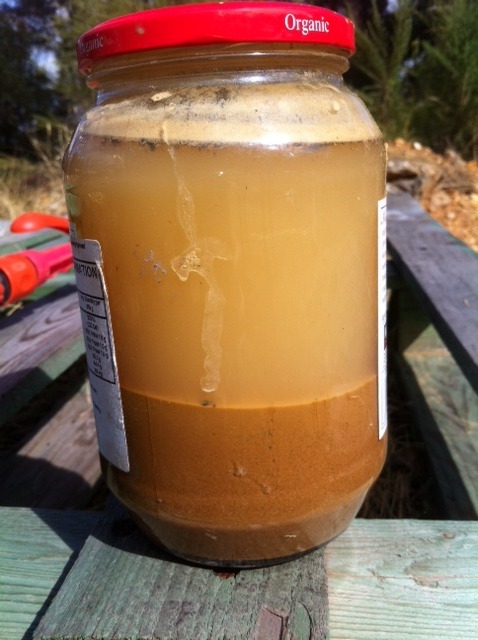
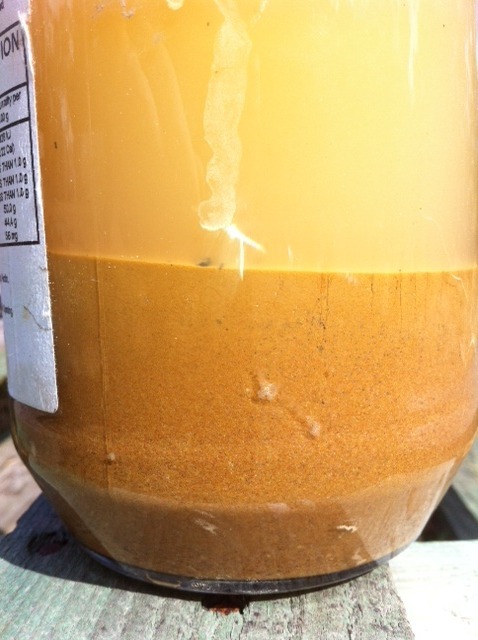
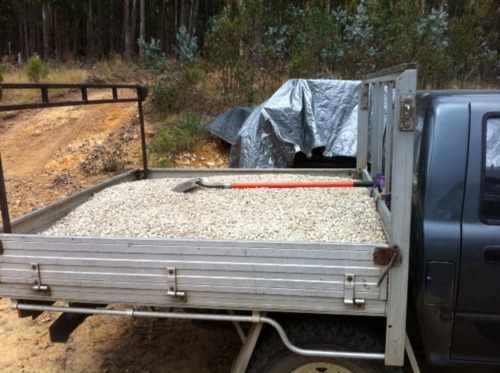
After looking closely at the sedimentation test, I reckon the soil is 90% clay, with a little bit of aggregate.  This is a problem, since all-clay soils aren’t suitable for ramming as they tend to shrink.  Good thing I’ve got a pile of sand left over from forming the slab pods! :)


First, a drop test.  This first one was pure soil (i.e. clay):


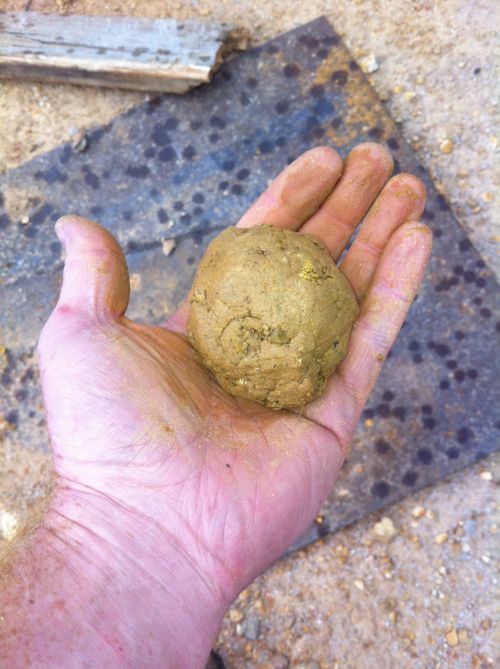
.. and after the drop:


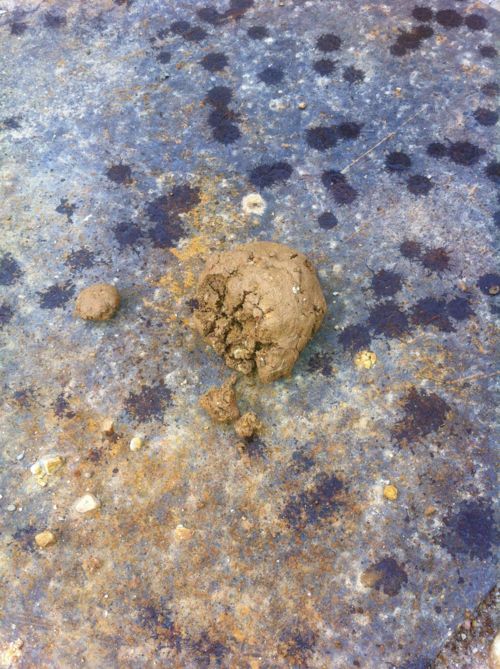
Not a lot of fracturing going on there, which is what we’re after.  Another, with a little sand mixed in:


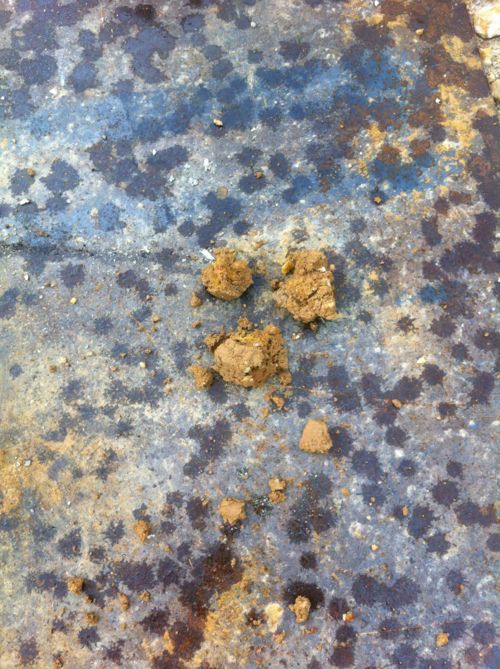
Not quite what I had in mind, but better than the first.  It does at least confirm that I’ll need to add a little sand to the soil before it’s suitable for ramming.


So, with that in mind I mixed up a wheelbarrow with 2 parts soil (clayey) to 1 part sand, with 5% cement added to stabilise it, and a little water to bind and activate the cement:


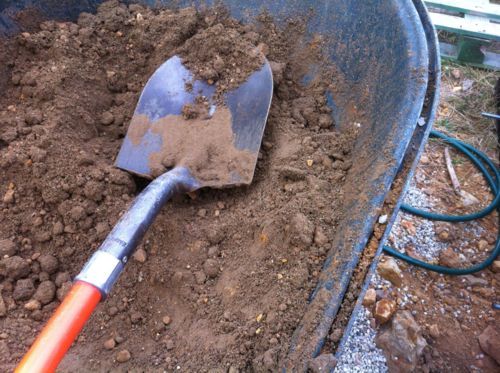
If nothing else, this exercise highlighted that I should either use the bobcat to mix the soil, or buy a cement mixer… mixing in a barrow is just too much hard work!


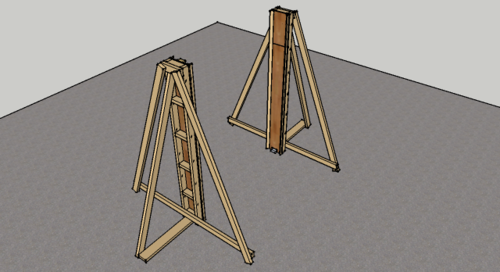
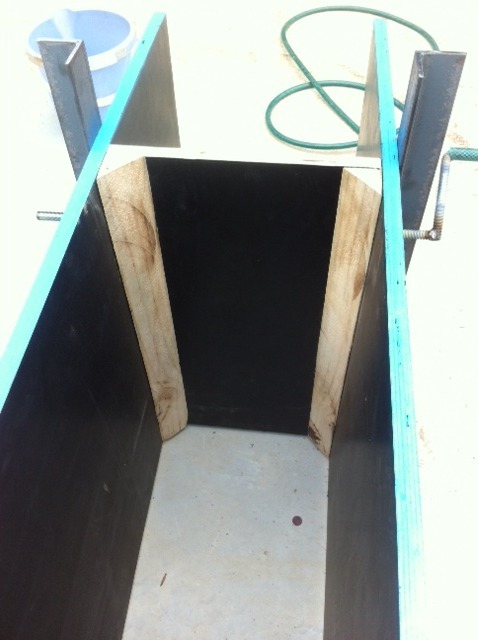
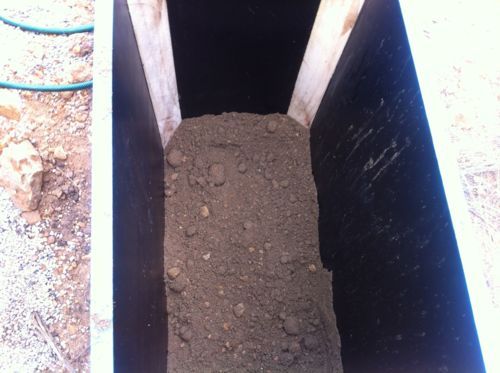
Anyway, into the form!


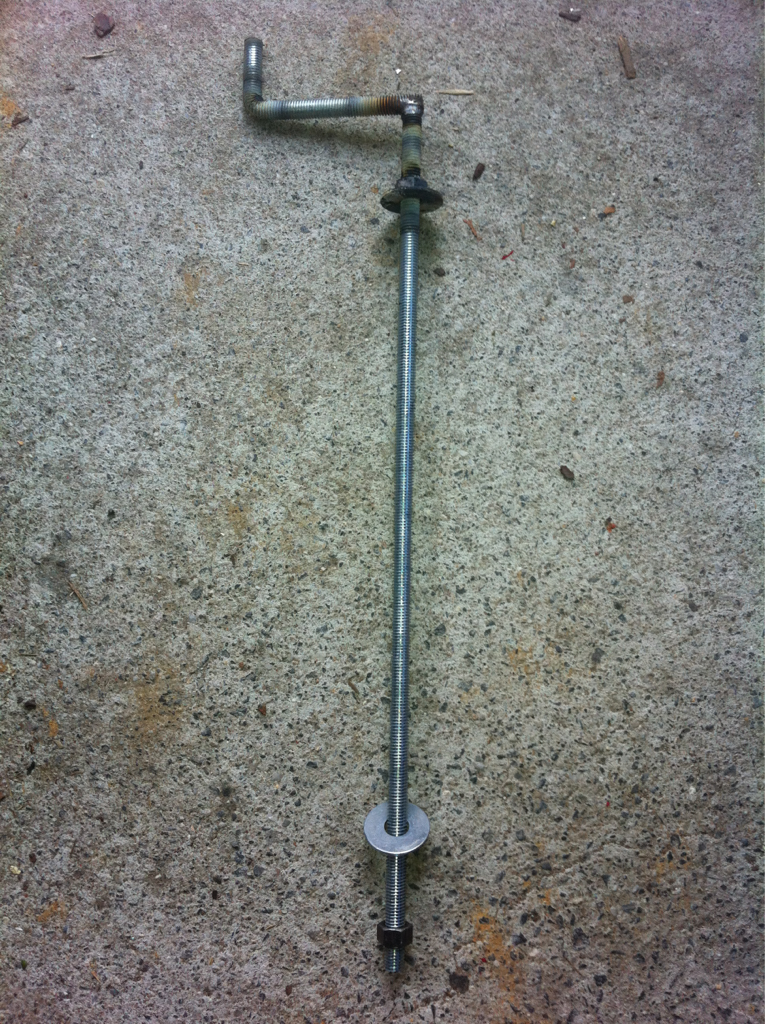
These are the tools I’ll be using to ram the soil:


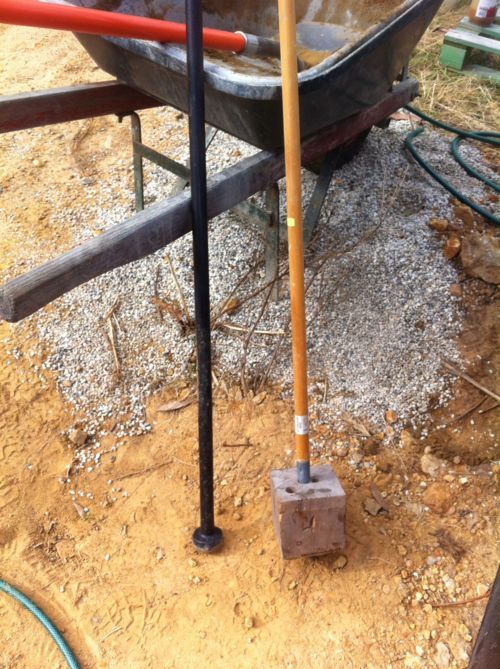
On the left is the crow bar (I bought this one because it has a nice round head which I thought might come in useful :) ) and on the right, a makeshift tamper I threw together using a paint roller extension pole and a piece of scrap cypress pine. I don’t expect this to last very long ;)


After tamping it down a little with my makeshift tamper, this was the result:


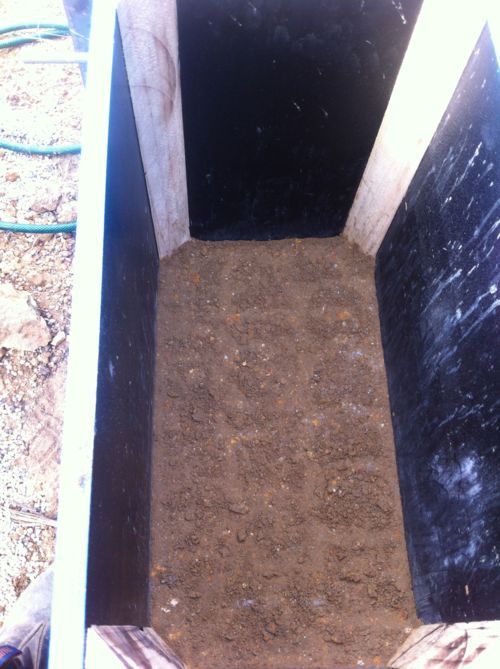
Not bad! The pole-and-block tamper really is too light for this work though - the crow bar was able to compress the layer another 20mm or so.


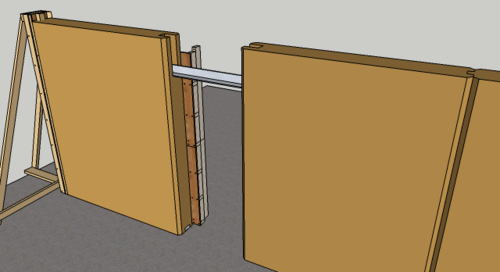
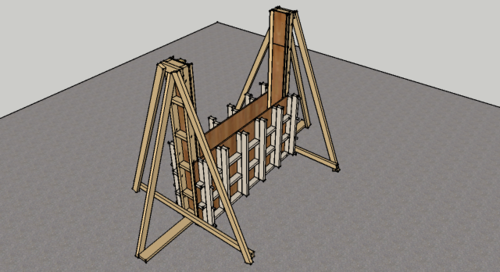
After a few layers, I noticed that the pressure of the tamping was forcing the end form piece out of position and worse, the whole formwork was being lifted off the ground.


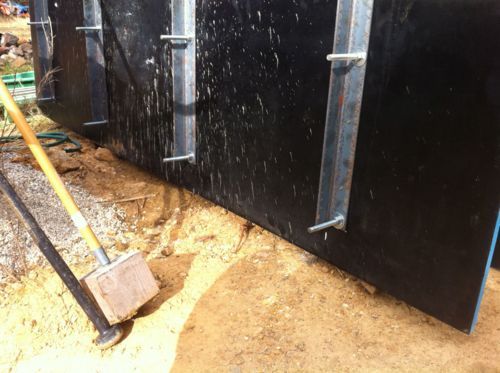
Not only that, but even though all the bolts were done up tight, the form was bulging a little where I was ramming and forcing the whole unit slightly out of shape.


So it looks like a slight modification to the design is going to be required - longitudinal reinforcement is more critical than vertical, so I’ll add a couple of horizontal lengths of steel angle on each side to hold the unit square.


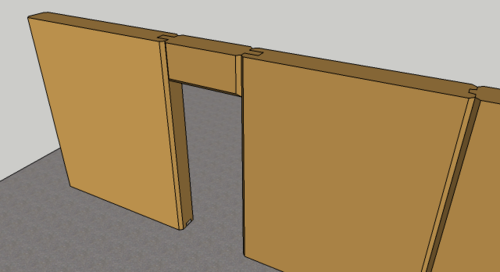
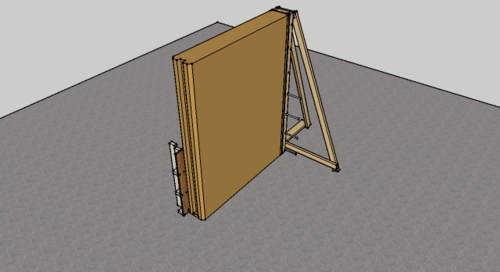
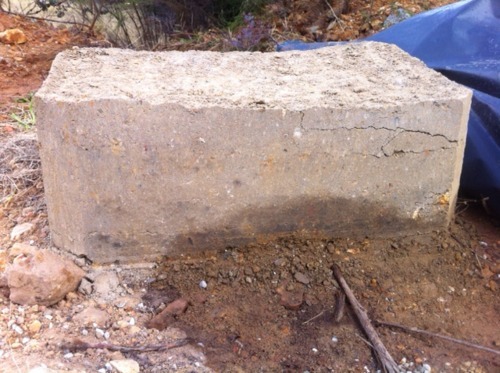
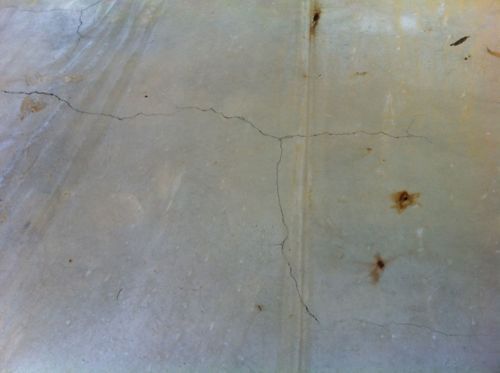
Either way, the aim of today’s test was to learn, and I did plenty of that :) Even though it’s lop-sided and not square, I’m thrilled with the end result:


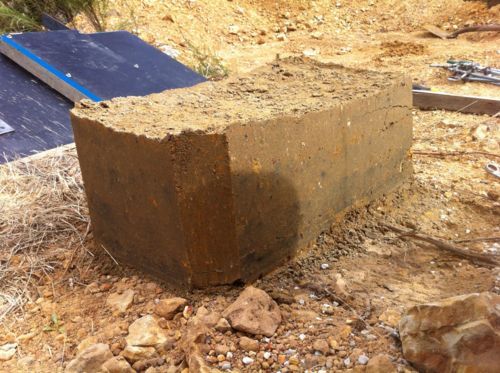
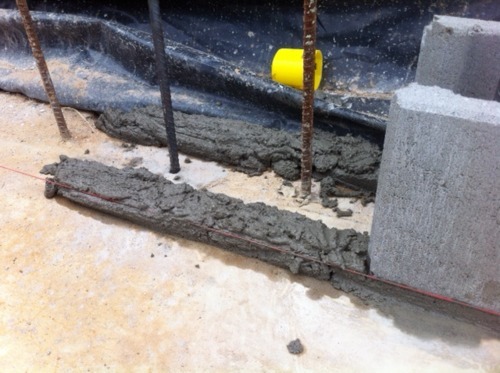
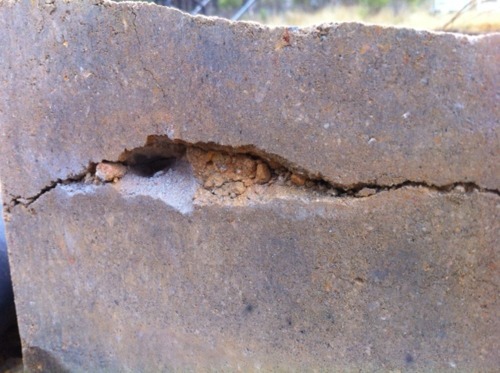
The form was removed as soon as I finished tamping, and this was the result.  It’s rock hard, and although there’s a crack in the final layer I understand why this happened - the last of the material in the barrow was dryer than the rest as I didn’t mix the water thoroughly enough, and that was the side which pushed the form out of position.


I’m not thrilled with the colouring as both the sand and cement are grey which takes away from the natural colour of the soil, but as it dries it’s getting lighter and more appealing, and as the cement goes off it just gets harder. I think I’ll order a batch of yellow brickie’s sand when I come to ram the wall, as this will give a more natural colouring.


So as we hoped, it seems we’re going to be able to use our soil for ramming! :) The big lesson to take away from this exercise though is that there’s no way I can do this job by myself - it’s just too physical and slow with one person doing the mixing, transporting and ramming. I also think I’m definitely going to have to find a pneumatic rammer somewhere, because I have blisters from just doing this tiny test.

Friday, February 10, 2012

Soil Testing

As planned, I ran a couple of tests using our soil this morning. The only problem is that I’m still no wiser as to the soil composition.


According to the BrightGreen document, the soil should separate into aggregates, sand and clay. Trouble is, mine looks like this:


I can’t really see any layering in the sample at all. So it’s either all clay, all silt, or I just don’t know what I’m doing :)


Regardless, I pressed on with the formwork and have now finished and assembled one set.


Nice internal chamfers, to give the corners some good definition.


These were a bit of a challenge to cut on the table saw, especially given that earlier in the day I managed to misjudge the blade and cut a very nice groove in the end of my right middle finger. Ouch!!!


The other job on the agenda today was to clear out the trench between the slab and the cutting, in order to install some ag pipe for drainage. There is still one piece of formwork in place there which really doesn’t want to be removed, and I’m splintering it and making a real mess in the process. It’s gotta come out though, because this has to go in:


The only problem is that there’s now thunder and lightning going off all around, with a real threat of rain so I’ve had to pack everything up. Of course, it’s not raining and probably won’t, either…


Maybe tomorrow I’ll actually be able to get earth into a form!


Thursday, February 9, 2012


Rammed earth formwork cranks are done. Soil testing tomorrow! :)

Wednesday, February 8, 2012

Approval! (well, nearly)

Peter sent a note off to the structural engineer last week, and we’ve had initial feedback and it’s positive!  He doesn’t have an objection to using rammed earth for the inner structural wall, so now we’re just waiting for his revised specification so we know what reinforcement and structure is necessary.


So, it’s full steam ahead this weekend to finish my first set of formwork and get stuck into a test wall.  I’ve been doing a lot of research this week into the construction methods, soil composition, formwork design, etc. and I’m starting to get a feel for what I’m facing.


Typically, the soil composition is around 30% clay/silt, and 70% sand/gravel for unstabilised earth, or with up to 10% cement to stabilise the mix. Since ours will be a load-bearing wall, I’m expecting to use cement.


According to brightgreenresearch.org, there are a number of simple on-site tests for soil suitability:


smell test can determine if there is organic matter in the mixture; pure loam is odorless. The texture of the soil when tasted can also reveal the basic soil composition. High clay content produces a sticky or floury sensation in the mouth.


(not sure I’m going to eat our soil to find out…)


And:


wash test, done by rubbing a damp soil sample between the hands, reveals how sticky the soil is. If the hands can be cleaned by rubbing them, the soil is silty. If the hands require water to be cleaned, the soil is clayey. If, when rubbing the hands together, grains are felt, the soil has a high sand content.


sedimentation test visually displays soil composition in stratified layers. A soil mixture is stirred with high amounts or water in a glass jar. The content is allowed to settle revealing the soil composition. The largest particles settle first, on the bottom, and the clay settles last, on top with the organic material above the clay.


ball dropping test displays the binding strength of specific soils. A ball of soil with a 4 cm diameter is dropped half a metre onto a hard, flat surface. If the ball shows few cracks and generally maintains its shape, flattening only slightly, the soil has a high binding force. This means that the soil has a high clay content and must be thinned with sand. If the ball completely falls apart and disintegrates on impact the binding force is too low and the soil should not be used for construction. If the ball displays deep cracks or moderately falls apart the soil can be used without amending the soil much.


The soil that I’ve excavated when preparing the site seems to be pretty suitable (at least, to these admittedly inexperienced eyes) but I’ll perform a few of these tests over the weekend and then we’ll know.


Saturday, February 4, 2012

Forms

Back into it early again today.  First thing on the agenda was to strip the forms from around the slab, and see what sort of a job I did with the vibrator. (This is a modified whipper snipper with a … big vibrator on the end, which is used to liquefy the concrete and flow it into tight spaces).  Turns out it worked pretty well, all the edges are solid and well defined, with a perfect rebate on which to install the Hebel panels later.  Good stuff.


Stripping the forms and removing them turned out to be more work than I anticipated, and took nearly all day.  There are still a few bits of form ply in there which seem determined to stay where they are, and frankly I’m inclined to relent and allow them. The alternative involves digging, and I’m just not sure I can bring myself to do more of that just yet.


I did manage to spend a couple of hours building new forms too, for the rammed earth.  This is the first set, which was really just practice in building the forms and allows us to build a test wall somewhere to test the composition of our soil and its suitability.  I’m yet to hear back from the engineer, so this may be entirely premature if we can’t build this first structural wall in earth, but hey.. I’m an optimist :)


This is what I wound up with after much cutting and grinding:


I still need to make up the threaded rods which will compress the forms together, that’s a job for tomorrow.


The last thing on the agenda today was to get the plastic off the slab, and see what we’ve got.  I think I should have been wearing gloves when I rolled the plastic up - the liquid underneath it was all soapy and slippery, and my hands pruned up very quickly and felt really, really weird.  I suspect it was a plasticiser additive in the concrete.. here’s hoping it’s not hazardous :o


Anyway, there’s a slab under there!


It’s looking pretty good! There is a very slight low spot just above the pipe in that photo, but overall I’m very happy.  It doesn’t look like the VicRoads-induced delay did any permanent damage either, which is a relief.


There are quite a few surface cracks visible, but that’s to be expected. These are really only visible when the surface has been wet - I can’t feel them at all.


They really do look worse than they are - they’d be invisible dry, and can’t be felt at all.

Friday, February 3, 2012

Running around

Lots of running around today.  I had one of our 1000L tanks on the back of the Hilux full of water, so had to get that up to Tallarook and decant it into the other (empty) tank.  It’s always fun driving with a tonne on the tray, nose pointing to the sky.  I’m always impressed by this Hilux, it’ll do anything and go anywhere.


With the water unloaded, it was back to Melbourne to fit the carry bars to the ‘lux so I could pick up the materials for the rammed earth forms, then back up to Tallarook.  It was 6pm by the time I got there, so decided my first stop would be the pub for dinner :)


This is what greeted my by the time I finally got up to the block.  Warm, still, the kookaburras engaged in their competition and this view.  If I ever lose sight of the goal of building up here, remind me of this…