Thursday, April 26, 2012

The big reveal

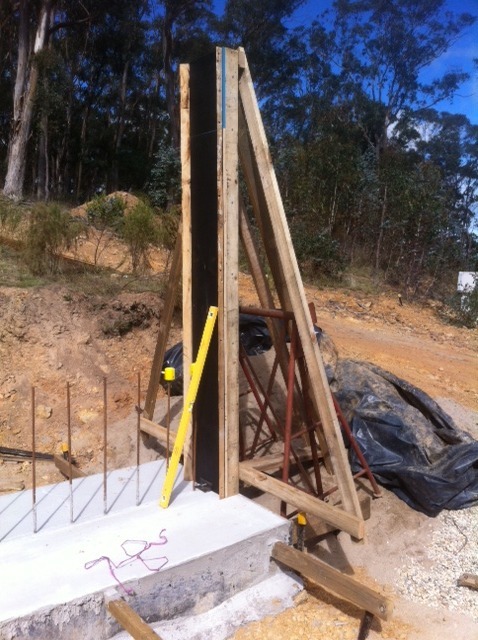
Made a mid-week visit to the site today to strip the formwork off the wall, as it has been raining rather a lot over the last day or two and although I made some very last-minute attempts on Sunday night to protect the top of the forms from the rain, I was sure it would have the last laugh and filled the formwork with water.


As it turned out, my makeshift protection did a reasonable job and the top of the wall was largely dry, save a small puddle at one end.


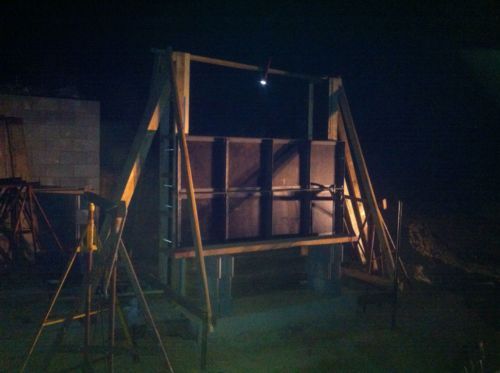
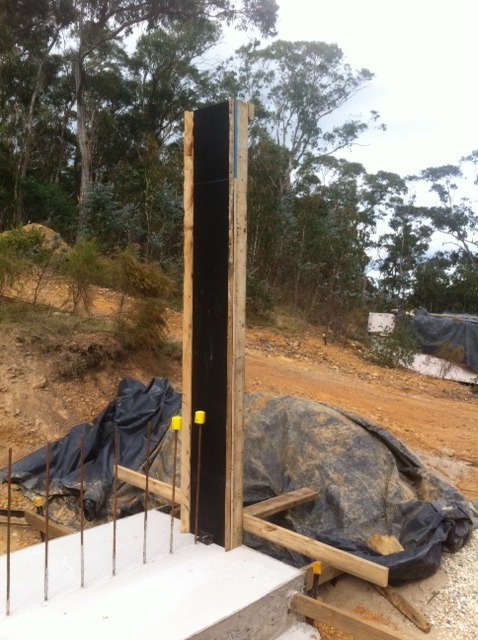
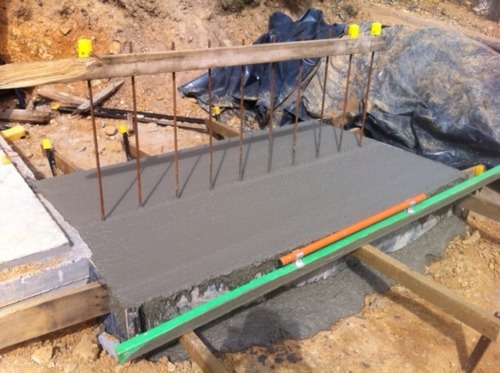
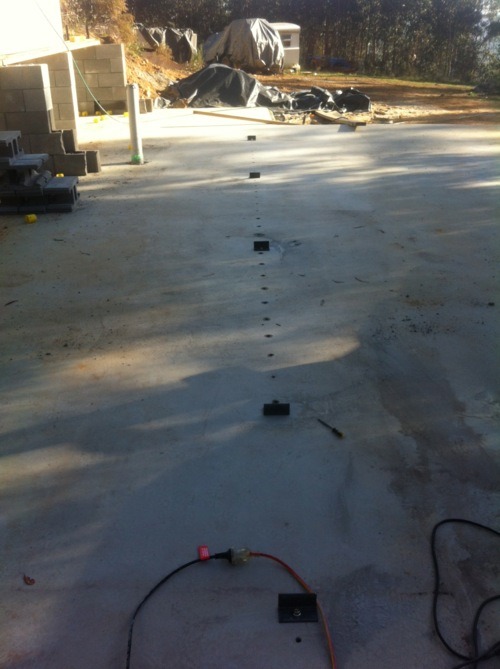
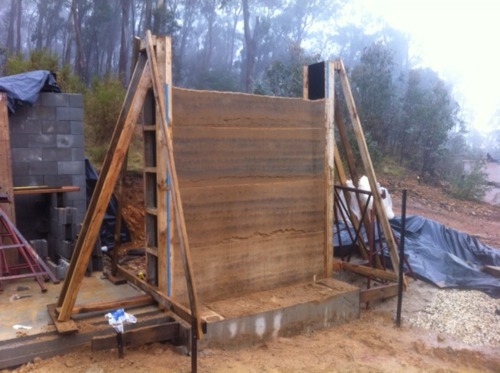
This is what greeted me: cold, wet, and muddy…


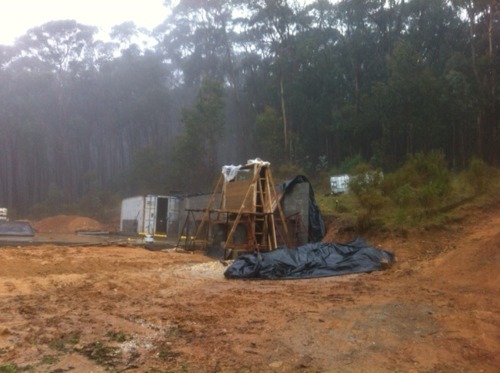
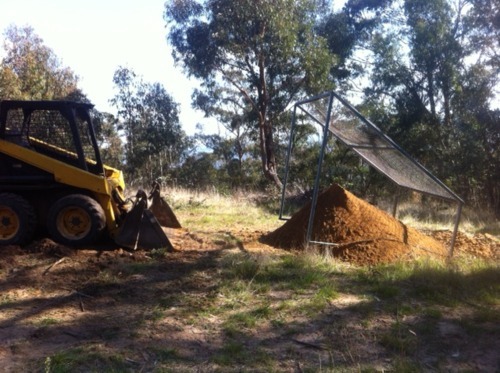
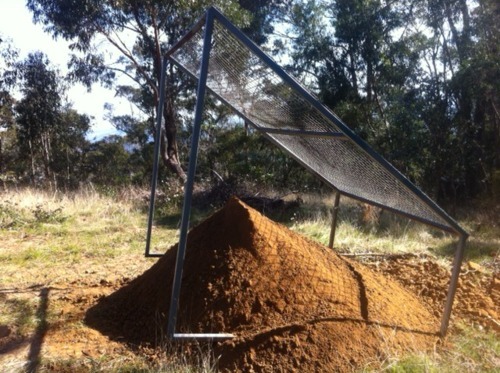
Interestingly enough, although the ground around the wall was sodden and sloppy, the area which I used to mix the wall material was quite dry and powdery. Seems the Plasticure does really work, and repels water quite well.


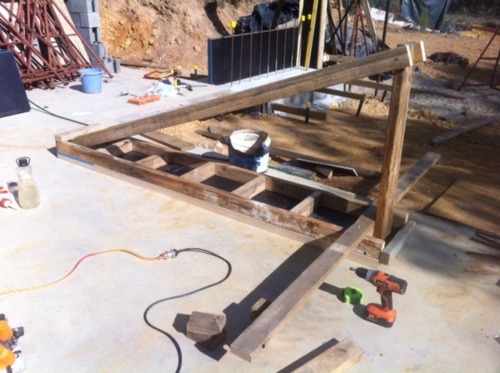
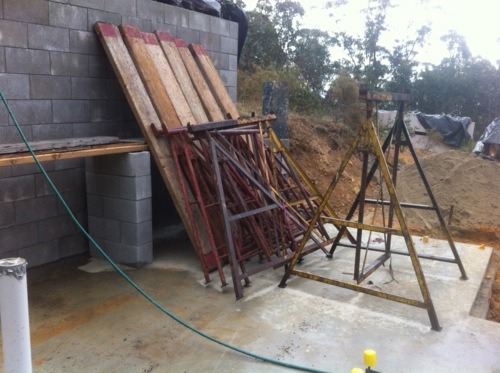
Stripping the form panels solo is an exercise in careful thought, since they’re bolted together and support each other. It took about an hour in the wet mud to get all four panels off the wall, but no owner builders, small children or dogs were harmed in the process which is an important achievement :)


Once the panels were off I was able to survey the damage. Not surprisingly, there are a couple of problems with the result:


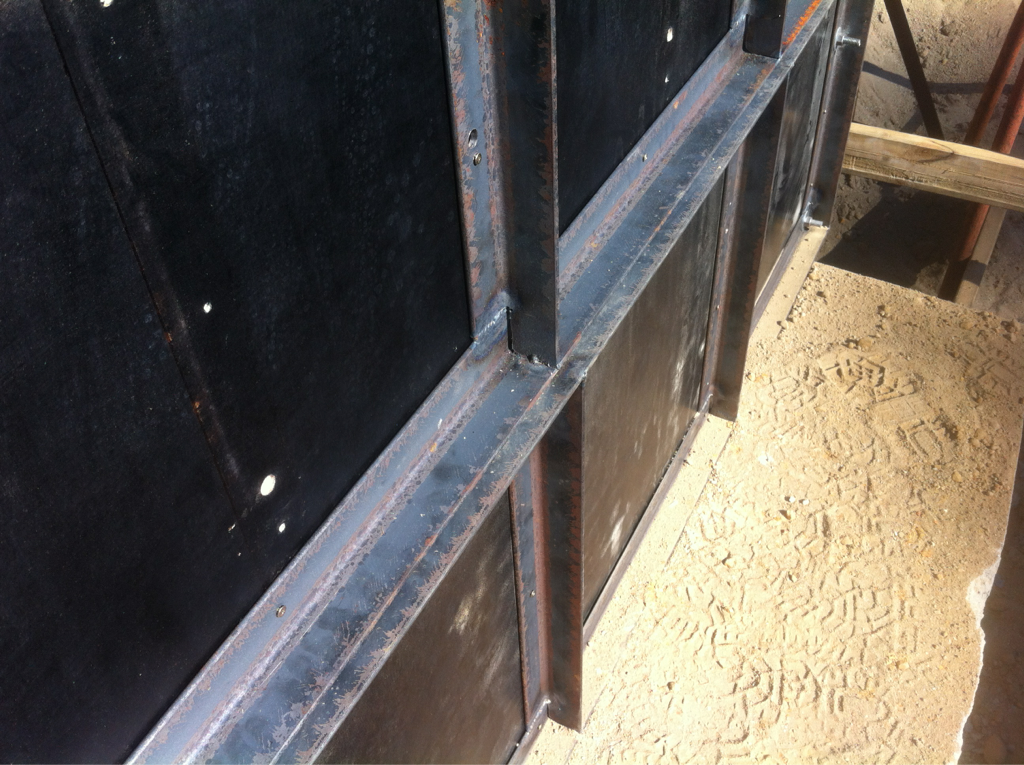
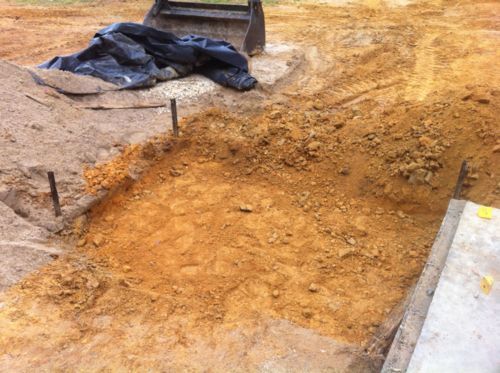
  1. Where the form panels joined (or more accurately, didn’t) there is quite a step in the earth which matches the misalignment of the panels. This is quite a sharp step which is fairly easily crumbled away leaving a flaw in the surface finish. The lesson: Make sure all formwork joints line up perfectly, and cannot move during ramming.

  2. The dry joint as a result of the Saturday evening stoppage is easily visible at around the 1.3m high mark all around the wall. Although given its immense mass I doubt this would cause the wall to spontaneously fail, I’m sure that if I was to give the top part of the wall a decent shove with the bobcat, it would break off. The lesson: be more organised, and don’t start a wall panel unless it can be finished the same day.

That said, I’m very happy with the result.


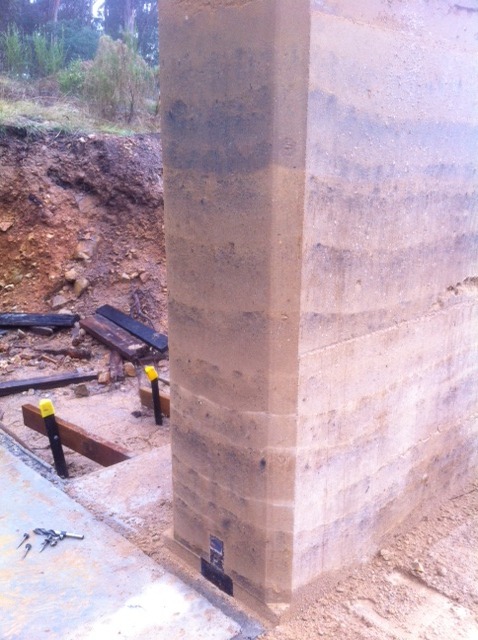
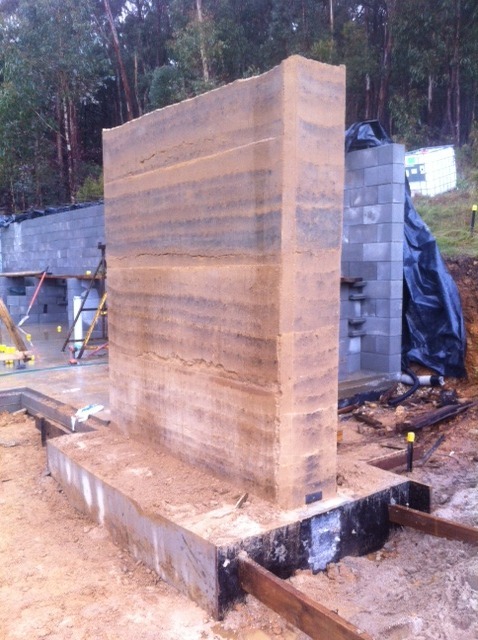
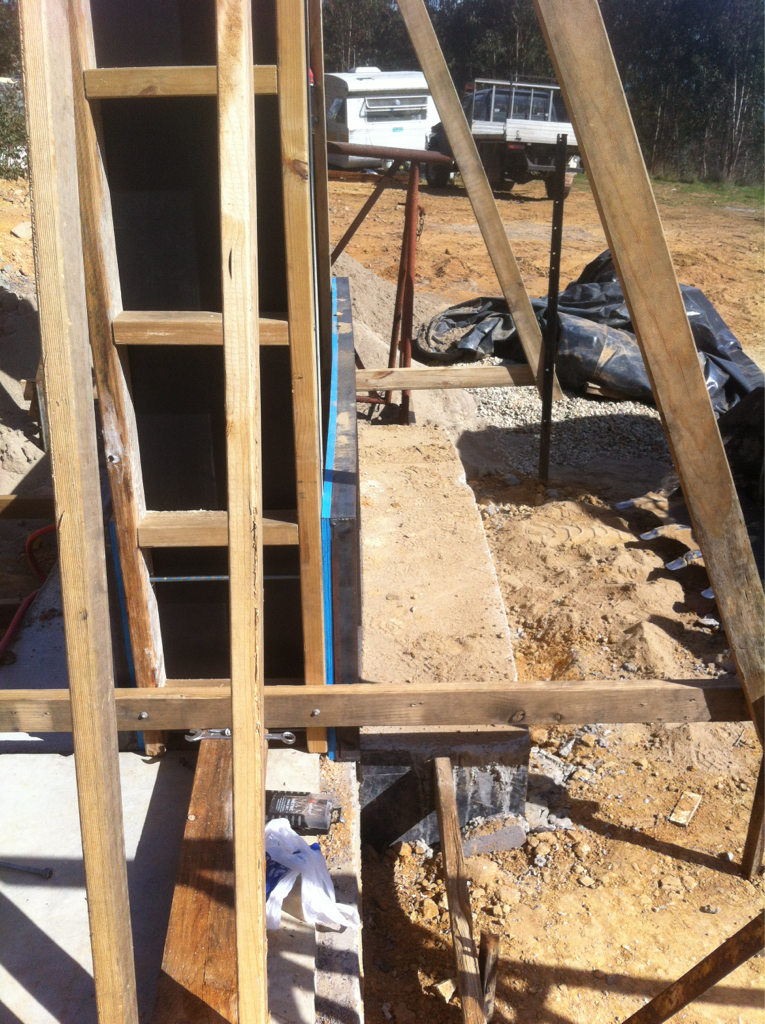
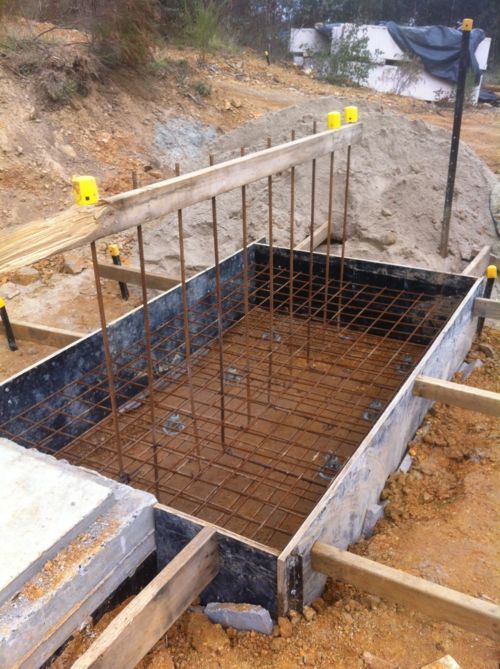
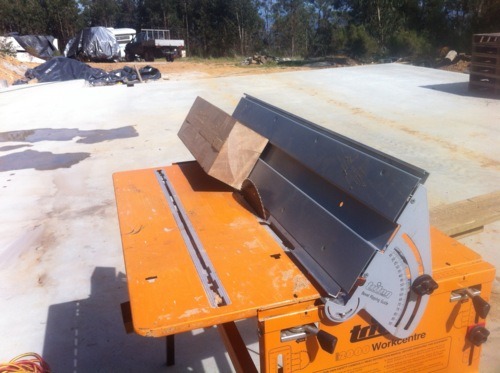
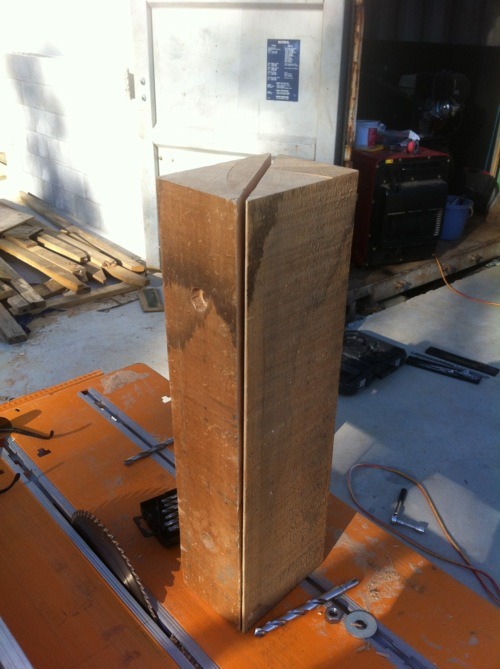
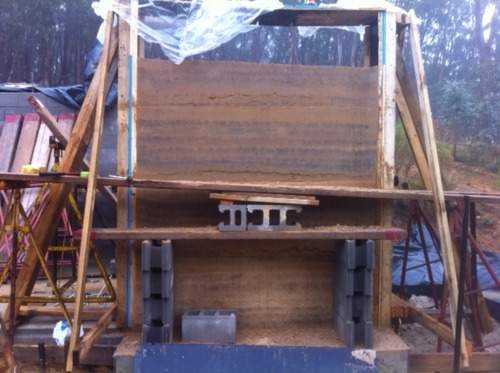
The columns seem to have worked brilliantly - the ends of the wall are perfectly vertical and straight, and the columns don’t appear to have moved at all during the ramming. Where the chamfers are screwed to the columns has resulted in a beautiful finish in the rammed earth - a perfectly straight, perfectly formed fillet in the wall and I couldn’t be happier with this part of the result.


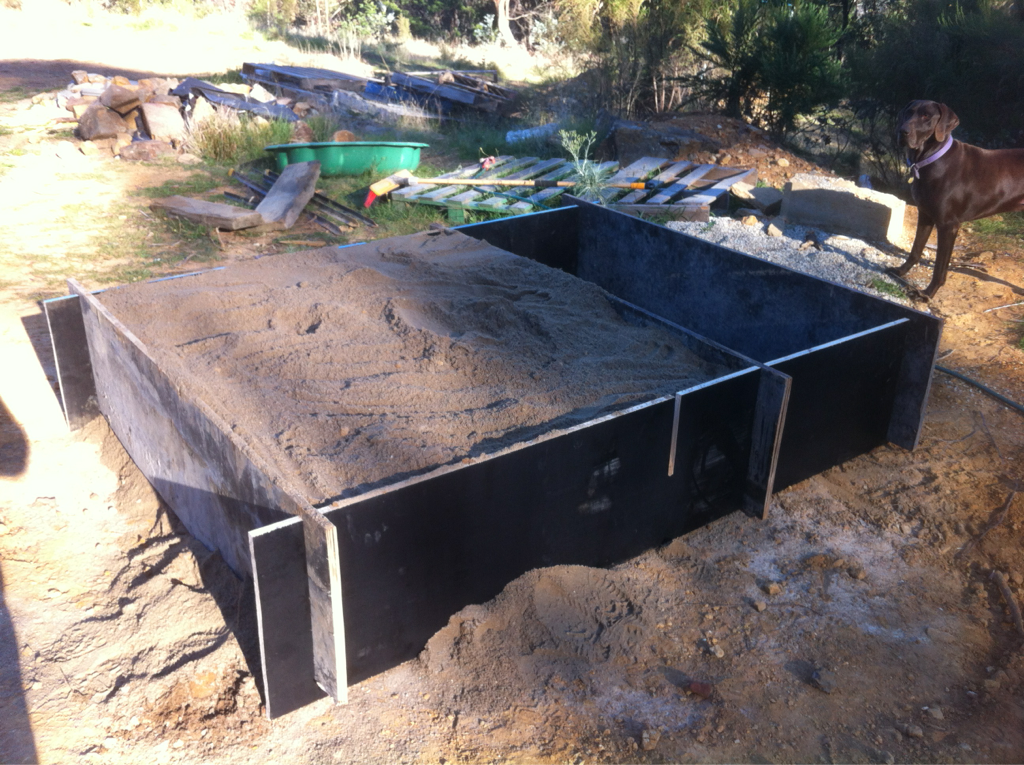
Another big win is the colouring of the wall. Although there’s a bit of temporary black staining from the virgin formwork (this is conspicuously absent from the pine chamfering) I’m thrilled with the colour of the result. I was quite worried that the wall would be too dull given the colour of the sand, but the strength of colour in the local soil (and the off-white vs GP cement) has won through to produce a beautiful warm, sandy finish. The ultimate colour will be a bit lighter than it is at the moment, since the wall is still drying.


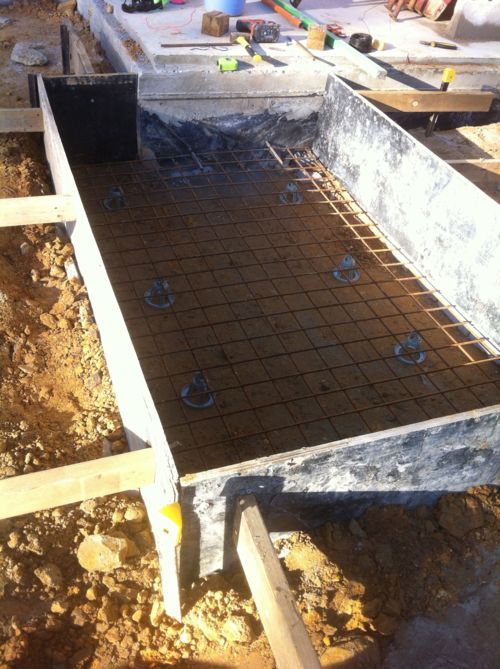
I love the appearance of the stratification from the ramming layers, it gives the wall such character. The captive bracketing holding the columns to the slab also worked brilliantly, another big win.


There will need to be a little judicious patching applied to some areas of the surface which were a bit crumbly, but all in all I’m very happy with the test. It’s served to prove that I’m able to use a blend of the on-site soil for ramming, and that my methods are sane and the process is within my range of ability.


I think I’ll take a weekend off building to give the trusty Hilux some tender loving cash in the form of a timing belt change and brake overhaul, then get stuck into the ramming for real the weekend after when the weather improves :)

Tuesday, April 24, 2012


This is a quick clip I shot while ramming one of the first layers in the test wall. I hadn’t figured out the best way to use the rammer at this point, so I’m moving much too slowly through the mix. It’s really well compacted, though ;)


The rather loud noise at the end of the clip is the air hose blowing off the barb fitting … oops!

Sunday, April 22, 2012

It's a wall!

After the boys’ swimming this morning we all headed up to Tallarook to finish ramming the wall panel. First job was mixing up a new batch of soil, but since I had half the last batch from last night left over I started with that and mixed in more sand, soil and cement. I’ve decided that with the materials I have on site, a 50:50 mix of sand and soil works best - more sand and the mix is too dry and won’t hold together, but it’s important not to get it too wet because then it doesn’t ram very well - it stays a little spongey, rather than compressing rock hard. There’s part of one layer at around the 1.6m high mark which got a bit too wet during an insta-storm this afternoon, which might cause trouble with cracking later as it dries and shrinks. We’ll see.


One of the things I was worried about and wanted to verify with this test wall was the colouring of the final product given the source materials. My little test block which I rammed a few months ago was a little dull in colour, but that appears to have been the fault of the grey GP cement as the off-white cement I’m using in this wall doesn’t dull the colour at all, and the wall has taken on a darker, rich tone from the intense red-orange of the local soil. I’ve not yet really seen the naked wall in sunlight, but what I have seen looks pretty promising.


Where the form panels join there’s quite a bit of patching required. Because the first panels bowed out in the middle quite considerably (20mm each in total, impressive considering how strong they are), I was unable to bolt the two courses of forms together as I had intended. This caused a step in the rammed surface of the wall which crumbles when the panels are removed, so when I do the next walls I’ll use a bolt through the middle of the panels top and bottom, with a length of half inch diameter conduit permanently embedded in the wall to prevent tear-out when the bolts are removed. This will keep the panels straight along their length, at the cost of a little imperfection where the through-bolt hole is patched. A fair bargain.


By around 5pm I had the third course of forms rammed to the top, so it was time to leapfrog the lower panel up to the top. This proved more of a logistical problem than I anticipated - not least because the two panels each side are bolted together, and each holds the other in place so when the bolts are removed, both panels will want to fall to the ground. Minor problem.


I solved this by stacking leftover concrete blocks (these things come in very handy) underneath the form panels, so three of the 200mm high blocks perfectly matched the 600mm high panels (there is a method to the madness ;) ) and they rested on these until they were lifted into place. Thankfully I had help for this operation - the neighbour Craig lent a hand to lift, and they slotted into place above the third course easily (and more importantly, safely).


I had expected to have to lift soil into the last course using buckets, but luckily the bobcat bucket goes just high enough to clear the top of the forms. At full reach though I can’t tip the contents into the wall, but since it’s a 4-in-1 I’m able to open the bucket and (most of) its contents ends up in the forms. Win.


Ramming continued into the darkness (again) until lightning began flashing around the hills and I chickened out, preferring not to be standing in the clear on a 2m high target. The final height before the rain set in was about 2.1m, and that’s where this wall will remain I think. I had intended to ram it to 2.4m, but that was an arbitrary choice so I’ve arbitrarily changed my mind :)


So this test wall has indeed taught me a few lessons about the process.


  • First and foremost, the forms worked pretty well - I don’t think the columns moved at all, and although the panels bowed out impressively that’s easily remedied with a minor compromise.

  • Metering the sand and soil to get a consistent batch is important, and my metering box did the job well.

  • The bobcat did a very good job of blending the ingredients; it’s not fast, but it’s faster than either I or a cement mixer would be and the result appears to be good.

  • It’s important to get the moisture content right from the start, especially when using the Plasticure additive as it’s difficult (if not impossible) to wet the mix further once it activates. This is especially important when mixing the first batch of the day, since it dries out considerably with warm-ish weather.

  • It’s very important to set up an efficient work space ahead of time. Having everything ready to go, including forms, scaffolding and platforms on both sides, tools, etc. is crucial since the clock is running once the batch is mixed.

  • I really, really need a filter/dryer on King Kompressor. The amount of water it produces in the air is incredible, and the rammer’s exhaust ices up considerably which I don’t imagine is very good for the tool at all.

  • Finally, this is a really tough job to attempt solo. Setting up, batch mixing, filling the forms and ramming is a lot for one person to cope with. I’m not sure I could possibly complete a single wall panel in one day, even with everything set up in advance. It remains to be seen how well layers rammed from different batches on successive days looks and works.

All in all, I’m very happy with the test. It’s going to be far from perfect, but I’ve learned a lot of lessons in the process so the walls which count should be much better. One thing’s certain though - ramming a wall with reo mesh down the middle is going to be a royal pain in the arse…

Momentum

I managed to build up a little momentum later in the afternoon today. I got to within 100mm of the top of the first form panel by about 4pm, then lifted the second course into place and nearly killed myself drilling the holes for the clamping bolts. Both cordless drill batteries were flat so I broke out the rotary hammer, and when the 14mm drill bit caught as it was breaking through the last of the steel the drill (China’s Torqueyest, it would seem) threw me for six, wrenched both arms, broke the drill bit (!) and I only just caught the form panel before it fell on my head.


I’m a little bit sore now.


After I finished swearing (who, me?) and saying “Ow!” very many times I got the panel bolted into place and continued ramming. By about 5:30pm I finished the last of the batch, but not before it had dried out considerably and although I was initially skeptical as to how well the Plasticure would work, it did indeed prevent the mix from properly absorbing any more water. It seems however that a determined will can (with enough water) override the hydrophobia and I managed to wet the mix enough to use the last of it.


An aside: I think TechDry have a good racket going here - this stuff looks and smells exactly like watered down PVA glue. I’m tempted to try it on wood and see if it works like PVA glue too…


Anyway, with scant regard for the fading daylight and my aching arms I mixed up another batch with the aim of ramming at least half of the wall today. I reached the top of the second form in record time - I’ve figured out how to use the pneumatic rammer, it would seem. Rather than (as I was doing) moving slowly through the mix with the aim of thoroughly ramming down the soil, it seems that the tool is more effective if it’s moved across the soil fast enough so that each beat of the ramming head only slightly overlaps the last. In this way much less compressed soil is re-disturbed and you end up with a nicely compressed mix in no time flat. Well, perhaps some time, but less than before :)


Having nearly filled the second form, it was time to discover whether or not I need to make more form panels. I’ve read once or twice that ye olde earth rammers have leapfrogged two sets of panels up a wall, exposing the rammed wall below as the new section is rammed above. I had no idea whether or not this would work, or whether I’d end up with a large pile of once-rammed soil on my footing but to my relieved surprise it works rather well. Actually lifting the lower panel into place is, however, another matter entirely - these things are heavy, heavy, heavy and if I was thinking about getting a hernia, this would have sealed the deal. I really must work out a better way for the next lift, or the term “nearly killed myself”  will become “was tragically crushed by”…


This is what lay hidden behind the first form panel. Please excuse the nasty phone-flash-photo - by this time, the sun was shining on Americans…


I got about half way through the next batch of soil, and to a height of around 1300mm working by the light of a silvery Hilux before King Kompressor cried enough and ran out of fuel. This thing sure does like a drink - 10 litres of BP’s finest to get this far…


So that’s where I left it. It’ll still be there tomorrow, and then we’ll see what a dry joint looks like in a rammed earth wall…

Saturday, April 21, 2012


This is a problem…


I don’t stand a chance of even coming close to being able to ram this whole wall panel today.


In two hours I’ve managed to half fill one form panel - I’ve been stopped twice with air hoses blowing off barb fittings, once for the extra sand delivery, and now for lunch.


The formwork is showing a little strain too - a little creative innovation may be in order to get close to a straight wall…


I’m about half way through my first batch, and they take about an hour to mix. So that’s three more hours mixing, at least 6 ramming plus stoppage time. Midnight, here we come…


No time like the present!!


My first batch is all mixed, including the Waterproofing so it’s not getting any wetter than it already is!


Time to fire up King Kompressor and get ramming! :D


Hiccup #1.


I had suspected this would be the case but until I assembled the metering box I didn’t know for sure - but I don’t have enough sand on site for a 2:1 sand:soil mix. Bugger!!


I’ve rung the supplier and he can have a load up here “later today” but there’s no way of knowing when that is.


Now … The big question: should I press ahead with what I’ve got and hope I can finish the panel today, or do I wait?


Damn.

Prepwork

A busy, busy day today prepping for the earth ramming tomorrow and taking care of all those little “do it later” jobs. First priority was finishing the assembly of the formwork - fixing the second set of corner chamfers, and sealing any gaps with silicone to prevent earth getting caught in behind and tearing out when the forms are removed.


With that done I bolted the retaining bracket to the new slab - it’s only a week old and quite surprisingly, it’s still pretty soft. China’s Finest Hammer Drill sailed through the holes as if they were in timber, but the dynabolts went in and gripped well so it’s hard enough.


Time to erect a column, then! :)


With the column bolted to the slab via the dynabolted bracket, it was surprisingly solid even without any props. Not quite plumb though and with a bit of a breeze it was time to prop the column solidly in place and plumb it properly.


Because I’ll be building the for-real rammed earth walls in the middle of the garage slab, my columns are designed to be erected without needing any fixtures other than the one bracket at the end of the wall, which is captive and remains in the wall once it’s rammed. This test wall however is within reach of the ground, so since I’m unable to brace the props against the slab I used star pickets and tek screwed them to the props. (An aside - if there’s been a better invention in the last 50 years than the Tek screw, I’m yet to see it!!)


I learned a lesson erecting the first column - attach the props while the column is on the ground, rather than having to climb 2.5m into the air with timber, drill and screws…


Second column coming together:


With this second one I have to address one of the little gotcha’s - there’s not enough space to install the column at the level of the new footing, since it’s lower than the top of the slab. The solution turned out to be very simple - a piece of 70x45x400 pine screwed to the bottom of the form to take up the Hebel’s rebate space. There’ll be a bit of an imperfection in the surface finish (the pine is straked, not smooth) and there’s no chamfer, but since this end of the wall will butt against the installed Hebel they’ll never be seen. Win.


With that sorted, I waddled over to the footing carrying the second column upright (damn, these things are heavy!!).. and both columns are now firmly fixed in place. I began plumbing the second column as I did the first, but then realised that since I have the one column perfect and they are precisely 2.0m apart, I could simply place a spacer at the top of the columns and then brace the second column against that. Much easier! :)


As the wall approaches full height I’ll simply remove this spacer - it’s just sitting there -  and the wall will provide the bracing itself.


I’m quite pleased with the installation of the columns - they’re very rigidly located and I’m confident there’ll be little movement during the ramming tomorrow (famous last words I’m sure!)


I managed to get one set of holes drilled for the clamping bolts, and will drill the rest as I build tomorrow.


My other job for today was to build a metering box, which will help me maintain a consistent earth mix between batches. Yet again, Sketchup to the rescue! :)


I’m expecting to need a 2:1 sand:soil mix, but I may be able to get away with 1:1 so the box has a divider which can be moved to accommodate the different ratios. I’ll just fill it to the top with the bobcat on a flat surface (if I can find one!), then dismantle the box and mix the two components with the 4-in-1 bucket, lifting and dumping the mix until it’s completely blended.


I managed to get most of the timber cut for the box before I ran out of daylight, so I’ll have to finish it at sparrow’s fart tomorrow.

Wednesday, April 18, 2012

Gearing up to ram

I’ve been spending my idle moments (yeah, right) thinking about all the little things that could get in the way or go wrong this weekend with my test wall. So far there are two little gotcha’s:


  1. The footing for the test wall is not at the same height as the slab. The slab has a 75x50 rebate cast into its perimeter to accept the Hebel panels, and I poured the test footing to the level of the rebate and not the full height of the slab. I did this mainly so there will be no problem installing the Hebel later (trying to squeeze it into a gap which would inevitably be too narrow).
    This means that one formwork column will be positioned higher than the other, since it won’t fit in the 75mm space of the rebate and so I’ll have to work out an alternative means of securing it to the footing, as my 50x50 angle solution won’t work.

  2. When I cast the footing I didn’t provide a 400w raised section upon which the RE wall will sit. Usually this is done to ensure that the wall will not be damaged by either ground or rain water.

I’ve not really come up with a solution to problem #1, but when I assemble the forms on Friday I’ll probably just wing it and cobble something together. No biggie.


Number 2 is a little more concerning, but I’ll kill two birds with one stone with this one. The test wall is an external feature, so at some point it will need protection from the rain lest it saturate the wall and reverse the action of the cement, causing the wall to fail. Now, in its position I’m not really going to be able to completely protect it from the elements (this is the job of the wall as a heat shield, after all) so I have to take some alternative measures.


I had originally planned to seal the wall using a TechDry stabilised earth sealant, but when I went looking online for a retailer I realised that their head office is a stone’s throw from mine and so I paid them a visit instead. In the process I discovered they have an alternative product call Plasticure, an additive which is mixed in with the raw materials before the wall is rammed which makes the entire wall hydrophobic, inside and out.


This is what I’ll use to solve the water problem. Apparently this stuff is so good that once it reacts with the cement and activates, you can’t wet the mix any further - it will simply not accept any more water. So it’s important to get the consistency right before adding the Plasticure, otherwise the batch has to be discarded. I don’t have enough sand for this kind of mistake (since I’m using up the last of the concrete sand I have on site to test its colouring), so I’d better get it right the first time ;)

Sunday, April 15, 2012

No work today.

Well, that’s not completely accurate…


There was lots of work done today, just none of it on our place :)


While my footing for the test rammed earth wall is curing, I can’t really do any more major works as I have the formwork largely completed with just minor assembly to do.


So, with fortuitous timing our Tallarook neighbours Craig & Bec are putting in an in-ground trampoline for their 4 (very soon to be 5) boys, so naturally I offered the services of Bob’s Catting to do the digging.


It took most of the day, but we managed to dig a hole about 5m long x 3m wide x 1.2m deep, and dug and placed footings for the trampoline frame. A good workout for the machine, as it had been sitting idle for a little while and really needs to be used in order to stay in shape (sounds familiar…)


So next weekend I finally get to start ramming some earth :D

As expected, no bull.

My morning today was spent pottering around with little jobs to get set for ramming my test wall. First off was moulding up the control joint tongue for the form columns, which has been specified as being 150x100.


Now, since rectangles are a no-no (and frankly, coming up with a 2.6m length of timber in 150x100 cross section is next to impossible without milling it myself) I decided to laminate this up myself from three lengths of 90x35 pine, ripped down to 50x35 each. Then, the two end pieces have a 15ยบ bevel ripped in them to give the rectangle a wide berth and minimise the chance of tear-out when the forms are removed.


What I’m left with is this:


This will get screwed to one of the columns when I come to ram one of the panels for-real. It’ll take about that long for the liquid nails to set…


Surprisingly this took me until about midday, and I suddenly realised that the concrete for the test wall footing was arriving at 12:30 so being short of actual concreting tools I quickly whipped up a float trowel out of scrap form ply.


Not flash, but the price was right :)


Not long after the truck arrived and about 10 minutes after that, the footing was poured.


I calculated just over 1.3m3 required, and with 1.4m3 in the truck we used it all with a little bit excess over the edge of the forms. I’m getting better at calculating volumes, it seems :)


After lunch my afternoon consisted of fun with the bobcat - specifically, moving the soil screen that I made up a few months ago as welding practice, and then working out the best way to dump soil onto it without tipping the bobcat onto its nose. It sure does get hairy lifting a full bucket up to full height - most of the time I find the bobcat balances on the front two wheels, and lifts the rears into the air slightly. It all happens very slowly though, so it’s safe enough - I’ve got tons of time to react and address the counterbalance.


After about an hour of this I have a metre or two of nicely screened soil all ready for mixing with sand for the ramming :)


I really do love the colour of the local soil - I will try to get as much of it into the wall as I can. The sand that I have on site is sharp concrete sand, locally mined from the Goulburn river and it’s just a little bit grey, but hopefully with the off-white cement I can get a decent colour in the final product. Without bringing in something like beach sand from a long way away, I’m not sure I’m going to have too many options as far as sand goes - I’m not keen on spending a fortune (or burning up all that diesel) to get a different sand on site, so I’m hoping the blended colour won’t be too dull.


Should be able to find out next week!! :D

Friday, April 13, 2012

No news is .. what news?

Friday, 10am.


I’ve still not heard from the building inspector about my strip footing for the test wall. Odd, I’ll sent him a text and ask.


Me: “Hi Joe, did Ken get chance to have a look at the strip footing? Aiming to pour concrete tomorrow.”


Him: “No, the gate is locked.”


Me: “Yes, that’s right - as we discussed, I’m not on site until later today. Is Ken not able to walk around it?”


Him: “No. Too far and his time is too valuable.”


WTF!?


A little back story…


When I last spoke to Mr. Inspector about this strip footing, I asked about the possibility of getting it inspected last Saturday (the middle of the Easter weekend). That was going to cost a small fortune in overtime, so common sense prevailed and I mentioned that I’d get it ready and we could have it inspected today, Friday. Mr. Inspector then suggested that they visit sites all the time which are unattended, so they could look at it during the week in my absence. Perfect!


So on Tuesday morning I sent them a text to let them know it was ready, and then left.


Then.. crickets. Nothing, until my text this morning.


Now, it turns out that “Ken” (name changed to protect the .. relationship) actually came up on Tuesday afternoon to have a look, but indeed found the gate locked (since I’m not here) and left as he was in a hurry to get to another job.


Fair enough.


But don’t give me some officious bullshit argument about his time being too valuable to walk for 4 minutes to the house site, when every time he visits we spend half an hour chatting about nothing, and then don’t bother to tell me the inspection hasn’t been done!


Especially since Ken lives literally just down the road and visits our neighbour on a regular basis.


@^*$& !!!


</rant>


Anyway.


I bit my tongue and very politely asked if Ken could possibly make a visit this afternoon, since I’d be on site from around 3pm. “Yes, OK” was the reply, and when I arrived at 3:06pm (having driven from Bright, two hours away) Ken was just about to leave again having found the gate locked, again.


Needless to say, the inspection has now been completed, photographic evidence taken and all in the space of five minutes, a new record. Clearly, time is money.


The concrete arrives tomorrow at 12:30. I’m fairly confident I can depend on them to get the job done, sans toro merda.

Tuesday, April 10, 2012

What day is it!?

I’m seriously losing track of time. Most of the time I do try to write up the day’s achievements here each evening, but this past weekend I’ve either been too buggered or too cold (truth showing through here) to sit in front of the laptop and write. And now I’m sure I’ve lost a day - I have three days’ worth of visible progress, and four days in the weekend… and no idea what happened!


There’s probably a very specific medical term for this, and if the researchers put two and two together and noticed that all the sufferers were owner-builders, then it would probably be named appropriately.. something like short-term construction-fatigue-induced alcohol-enhanced amnesia, or some such.


Anyway.


What I do remember is Monday - after talking to Peter about the plans for the next few weeks leading up to preparations for the suspended slab, I got stuck into the strip footing for the test rammed earth wall. Or perhaps more accurately, the weather largely prevented me from getting stuck into the strip footing. We had the worst kind of rain - intermittent. If it’s going to rain, I’d like it just to get on with it and get it over and done with, but noooo, it had to rain for 15 minutes, then clear up and promise sunshine. Then half an hour later, rinse and repeat.


Not a good recipe for progress.


After a while following the onset of another shower, Ewan and I gave up and hopped in the Hilux - initially to stay dry, then with the idea of running the engine to get warm (and charge the battery, which following our hilly adventure had been giving me issues turning out to be a dodgy earth). This turned into a visit to the servo on the Hume since the fuel gauge (which is particularly pessimistic and untrustworthy) was reading empty.


On our return an hour later (the Melbourne-bound post-Easter traffic on the Hume was unbelievable so we took the scenic route) the weather had cleared up so it was into the digging. First up, the Bobcat/backhoe got a warmup and easily took care of the hole in the ground:


Then the formwork, and the first layer of mesh:


Finally, the starter bars for the wall and the second layer of mesh:


… aaand we’re all ready for the building inspection.


Maybe. I’m sure there’s something I’ve forgotten, but we’ll find out during the week…

Saturday, April 7, 2012

Bit by bit

Today turned out to be a bit of a bitsa day. Bit of this, bit of that…


First job was to finish off some of the detail work on the rammed earth formwork. Primarily this was making up the block which casts a rebate into the wall into which the lintel slots, to support the panel above the doorway. I had originally drawn this in Sketchup just as a rectangular piece of timber and had never got around to revising this (square edges and rammed earth don’t mix; they cause tear-out and fracturing). Bluey on the BYOHouse forum suggested I make this block up out of two triangular pieces in order to disassemble the block and prevent tear-out, and this is what I’ve done.


I started with a piece of very nice Kauri pine, 150x150x500. Such a shame to cut into such a beautiful piece of wood :( but its sacrifice is for a good cause. First I ripped 50mm off one side, having to make two cuts as my bench saw only has a 65mm reach on the blade. Once both cuts were made I hit the remaining little bit with the reciprocating saw, and then sanded the scar neat.


Next, I bored two 12mm holes as accurately as I could through the piece, so that when I cut it in half and bolted it to the forms it would assemble accurately back into the whole 150x100 shape. I was as careful as I could be with the hand drill, but even guiding my hand with a set square I missed my mark by a millimetre or two over the full length. However, with a 19mm hole bored on the far side to accept a M12 nut, this was close enough.


Finally was the diagonal cut. I started this one with a hand saw, not trusting my accuracy on the bench saw but after about an inch I gave up on this endeavour and set up the mitre fence at precisely 56.3ยบ.


Two cuts later and I had about 30mm left in the middle. Not even the reciprocating saw could reach all of that, so I ended up making two cuts with that, as carefully as one can with a saw designed to take off an arm. A little judicious belt sanding later, and the product of an entire morning’s work was revealed:


The next little job I decided was to cut and dynabolt the brackets which will retain the formwork columns to the slab. Again this took longer than I expected, after carefully measuring the position of the holes in the slab (twice), punching a pilot divot, drilling them, drilling the brackets, bolting them in place, measuring their final position and wondering how on earththose two managed to be 5mm out of position each!


Naturally I don’t have my round file with me, so a little creativity ensued as I enlarged and slotted the holes in order to correct their position. The effort was worth it, as now all the brackets are millimetre accurate over the 9m length of wall. I’m determined not to allow little errors to creep up on me here ;)


I still have to drill and tap the vertical edge of the bracket to accept an M12 bolt to secure the column, but I don’t have that size tap (naturally) so that will have to wait.


That’s about where the day’s progress ended. During the afternoon Alissa and the kids came up to stay, and John dropped around for a chat (and boy, can he chat) and to drop off a couple of Acrow Z-bars and collars. He also dropped off a bunch of old brickies’ scaffolds which he’s had for years. Apparently they were “loaned” to him by another mountain resident years before while he was building his place and ever since he’s been looking for a new “home” to “lend” them to. These things are ancient, and have been passed from hand to hand as they’ve been needed. I’ll make great use of them myself, and then look for another suitable home for them :)


Friday, April 6, 2012

In other less expensive news...

I spent my day today working through my list of things to do this weekend, now that I can’t actually get any real visible building done.


First cab off the rank was the formwork panels - I cut all the steel for these last weekend after the Hilux rescue and took them home to Yarraville to weld during the week, and these came out pretty well. However, the ones I welded a week or two ago on site were not quite as accurately assembled, and once the form ply was screwed onto the frames there was a slight wave where the steel bracing was a little off alignment. There was only a millimetre or two in it, but it was enough to be visible (to me at least and I’d see the flaws in the wall every day) so I ground those braces off and rewelded them.


Much better (so says the perfectionist me).


So now I have four formwork panels, which I’m hoping will be enough to allow me to build the walls to full height, by leapfrogging the lower panel up above the upper one. Time will tell whether the rammed wall will be strong enough to support itself while being rammed above…


Next job up was to drill the holes for the starter bars for the rammed earth wall. When I built the retaining wall I had to add more starter bars to the ones we cast into the slab, and at that time my old, el-cheapo Chinese hammer drill gave up after two holes and I had to hire a rotary hammer at $48 per half day!


Walking through Bunnings (my home away from home it seems) the other day I spotted another of China’s Finest, a serious looking cast alloy Ozito SDS rotary hammer, for just over $100. At hire rates, that’s cheap.. and it had a 12 month replacement warranty so even if it did die on the job, I could have it replaced. I figure if it survives the first 12 months on this job, it’ll survive a lot longer than that so it has found a home in my arsenal. China’s gain is Seymour Hire’s loss, sadly.


So today I broke the seal on the drill and it sailed through, drilling 40 x 14mm holes in the slab, each 150mm deep. About half of those I hit rebar too, and while that slowed progress a little it chewed through without complaint. Happy.


That’s about where I ran out of daylight unfortunately. I’m seriously not looking forward to the next 6 months as the days get even shorter and much colder…


So tomorrow if I manage to crawl out of bed with the sun, I think I’ll warm up the bobcat and dig this mini-slab for the test rammed-earth wall, then assemble the reo and forms in readiness for my expensive inspection during the week. Or more likely, Coda will wake me up at around 9:00 to be let outside…

A $209.00 phone call

Yep.


Mouth, shut.


Now I have to dig a hole 1300x2000x450 and fill it with about $300 worth of concrete.  That’ll learn me.

Thursday, April 5, 2012

A variation to the plan

So for a few weeks now I’ve been planning to get my rammed earth formwork finished and get stuck into a test wall panel this long weekend. Not hard, just finish welding and assembling the form panels, cut the last chamfer for the second column and fabricate the rebate block for the lintel.


Except.


I’ve been thinking where to build this test panel. I want to make it a full-scale test, which means erecting a 2000x2500x400 lump of earth. This is going to need to be built somewhere level, and preferably on a concrete strip footing. Better still if it were a permanent fixture afterwards rather than something to knock down and dispose of.


Luckily, there is just such a spot - at the west edge of the pump room I’ve planned all along to erect a radiant heat shield for the entry door, and this rammed earth test panel would be perfect for the job.  So let’s build it there then!


Now, this is going to need a proper foundation if it’s permanent, so I drew up a strip footing in Sketchup and then I made my mistake.


I called the building inspector to ask if he’ll want to see it.


Me: “I’m thinking of building a test rammed earth wall before I commit to doing the real ones, in order to determine the correct soil composition and validate my methods.  I thought I might kill two birds with one stone and turn this into a radiant heat barrier for the pump room entry. Will you want to see it?”


Him: “Is it a permanent fixture?”


Me: “Well, yes I suppose it is but it’s not structural, just a heat shield.”


Him: “Then that’s a variation to the building permit for which I will have to charge you, and extra again for an additional inspection. Send me the drawings.”


In the inimitable words of James May, Oh Cock!


Sometimes I should just keep my big fat mouth shut.

Wednesday, April 4, 2012

How NOT to spend your weekend...

This past weekend was a bit of a write-off in building terms. The retaining wall core filling went perfectly on Friday, but that was where the plan fell off the rails. Saturday morning was dedicated to Ewan’s swimming (he made the all-junior metro semi-finals) so I was back in Melbourne for that, but that was always part of the plan.


Saturday afternoon I took all three boys back up to Tallarook with me to give Alissa a weekend off, and she had a girls’ night in at our place with a few friends. Meanwhile, the boys and I visited our neighbours Craig & Bec up at Tallarook and took the Hilux 4WD’ing down their track - great fun, and the boys had a blast.


Then, Craig and I had the bright idea that we should go and investigate the fire track that runs down the hill to the creek from our house site. I’d walked part of this track before and thought it too difficult to traverse with the Hilux, but after tackling Craig’s track I had second thoughts and so off we went.


We got down to the bottom of the hill without incident, and our reward was a beautiful spot where the creek meets cliffs and forms a nice swimming hole. There’s a track which runs along the creek too, which would make for a great adventure but we were running out of daylight so decided to head back up the hill for home.


We got about half way.


Well, more accurately: I got about half way, Craig in his Hilux got about two thirds but neither of us could get to the top. The track is very rocky having washed out considerably over the last 30 years, and underneath the rocks it’s quite soft so when you’re not bouncing across the marbles you’re digging in. There are some impressive rocks too, the biggest probably two feet across…


Did I mention that neither of us have a winch?


Both Hiluxes spent the night on the hillside, while the rest of us walked back up and tried to figure out how we were going to get them out. Craig rang a few locals looking for a winch to borrow, and eventually we were promised assistance by John (who owner-built his own house using the rock on his property just up the road) with his winch the next day.


We started around 8am and spent the whole day on Sunday hand-winching Hiluxes up the hill, literally centimetre by centimetre. Craig’s was reasonably easy, having one difficult section to pass before he could motor on up the hill under his own steam.  Mine, however was a fair way further down the hill and the ground had been chewed up considerably in Craig’s passing, so I had a much harder time driving out even with a tray full of rocks (too good a building opportunity to pass up!) for additional traction.


In then end we got mine to the point which stopped Craig’s before we were all spent, then cobbled together a 150m cable out of every scrap of chain, strapping and wire rope we could find and hitched my Hilux to Craig’s, and we just gave them everything and bounced up the hill around 4pm.


My clutch will never be the same, but seriously these Hiluxes are built to last. I can’t describe the punishment that mine took and it just keeps coming back for more!


So that’s how not to spend your weekend…


(I have to offer sincere thanks to John for coming to our rescue and working his arse off, refusing all offers of compensation. Also to Sean, Craig’s brother-in-law who was visiting from Port Fairy to help work on Craig’s house this past weekend, but instead spent the whole time helping rescue us. Neither will likely ever read this, but thanks guys!!)