Saturday, July 28, 2012

Backfill

Waterproofing this retaining wall is one job that I hope not to see again for a very long time! Most of my day today was spent in behind the wall, clearing the clayey, mucky spill out of the drainage trench in order to get the plastic sheet and drain pipe in place ready for the backfill. Mostly this involved scrabbling and scraping with bare hands in the freezing muck, as the trench is only about 100mm wide and I don’t have a shovel or trowel that small.


This was all well and good in the sections in which I could physically fit, but in the narrower bits there’s only about a foot between the wall and the hill and it’s near impossible to get in there to clear the trench by hand.


What I really needed was a trenching shovel, but I don’t have one and there’s nowhere within range on a Saturday afternoon to get one. So, necessity being the mother of invention and all I made one. I took an offcut of corrugated iron sheet which was lying around, hammered it flat and folded it up into a U-shape around a length of 70x35 pine, tek screwed in place. Brilliant, did the job perfectly! :)


So with the socked drainage pipe nestled in the trench below the level of the slab and the plastic sheet in place I was able to fire up the bobcat and start backfilling the void with the load of 20mm pebble I had delivered last week.


An hour or two later and approximately 13t of pebble found a new home:


This was itself a bit of an adventure - although it looked pretty solid on the surface, the hillside was incredibly soft under the weight of the bobcat and it sank up to its belly every chance it got. It was never quite bogged enough to require recovery, but it got close a couple of times where the only way out was downhill towards the retaining wall - not somewhere I wanted to be on very soft ground in a 3 tonne machine.


I’m going to have to have a think about how I will excavate this bit of hillside for the upper slab-on-ground. I think I will have to park the bobcat and use the backhoe attachment to reach in and dig, rather than my original plan of digging out level with the machine itself - it’s just too soft and wet to get in there…


So the plan for the coming weekend is to get another load of pebble delivered so I can finish filling the void, and then think about starting the excavation of the slab-on-ground site. It’s shaping up to be a dry week, so with any luck…

Friday, July 27, 2012

Hallelujah!

Even with the fair amount of rain and cold we’ve had this week, the wall has cured off nicely! :)


Unsurprisingly, there’s still a little green showing along the first course of blocks where the temperature barely rises above the ground temp of 8°C, but I’m able to hit that with the heat gun under the plastic tent pretty easily, so even today in the rain I’m able to make a little progress. Good stuff!


The plan tomorrow is to get a fresh sheet of protective plastic along the wall and get this sucker backfilled. It’s been a long wait to get this far… but it will finally mean I can begin excavating the upper slab-on-ground and make some REAL progress! :)

Saturday, July 21, 2012


It. Is. Done.
Three hours and two black sticky hands later, and the second coat is on. It’s starting to cure already, turning black in patches so there’s hope it’ll be dry by next week.
This time I’m giving it as much help as possible - since putting the “tent” up over it the air temperature inside has risen two degrees already, so with any luck…

Finally!!

So would you know it, after THREE WEEKS I finally have (what’s left of) the first tanking coat cured enough to apply the second.
This one is going on today, come hell or high water. The weather should be friendly enough - partly cloudy and 15°C today (at the weather station 400m below, so who knows what that means up here) and 16-15-14 over the next three days with zero rain.
Next time (!!) I’ll use the environmentally dubious solvent-based product…

Friday, July 20, 2012

I will...

.. get this effing membrane cured even if I have to set it on fire first!


The gas furnace did the bulk of the job last weekend, but like any blunt instrument there are still little patches (mostly in the hardest to reach places, naturally) which haven’t yet cured.
Today’s attempt involves a paint stripping heat gun, a long pole and copious cable ties.


I. Will. Cure. This. Wall!!!

Sunday, July 15, 2012


Desperate times and all. Yes, that’s a gas rocket space heater, and very slowly (but surely) it’s curing the membrane. I would have been better off with a radiant heat source (like a Ye Olde Dirty Coal Electric Bar Heater) but try coming across one of those on a random Sunday…

Friday, July 13, 2012

Tanking

So, this tanking membrane…


… isn’t dry yet!!


It’s been a week, and I’ve arrived on site to find that there are still relatively large patches which are still wet. These are mainly below the level of the hillside, and (probably not coincidentally) the work platform on the other side of the wall shades this lower part from whatever little sun graces us with its presence. Oh, and someone’s put a dirty great big rammed earth wall in the way of the sun too.


The nett result of all this is that I can’t apply the second coat, which is what I had planned to get done this weekend. !@#!@& !!!


Just to add icing to the cake, the guys supplying the gravel I’m using to backfill the retaining wall called off their delivery, as neither of their drivers want to attempt to get back out of our site when it’s this wet. Can’t say I blame them, and if I can’t get the tanking membrane finished then there’s no point delivering the backfill anyway. Damn!!


Anyway, I’ve spoken with the coating supplier and they’ve advised that it will cure properly, it just needs heat. Their application notes do mention that the membrane shouldn’t be applied in temperatures below 8ºC or with impending rain, but last weekend provided neither of those. Soo, I’ve gotta find some way of heating this bloody wall… the sun’s not going to cooperate.

Monday, July 9, 2012

Planning

So with a relatively slow day yesterday (it’s amazing how much more relaxing it is on the site when I’m not in the middle of a great-big-job-which-must-be-finished-today :) ) I managed to spend a little time thinking about the order in which events will need to happen to pour the next slab(s):


  1. Finish applying the tanking membrane to the retaining wall.

  2. Finish cutting the rebates in the rammed earth for the suspended slab forms.

  3. Backfill the void with free-draining but not sharp edged aggregate.

  4. Move my 1000L water tank which I have rather inconveniently placed right in the middle of my soon-to-be-earthworks. D’oh!

  5. Begin excavating and levelling the site of the first floor slab-on-ground.

  6. Dig footings for the slab.

  7. Use the spoil from the excavations to form up a spoon drain behind the retaining wall to divert surface water away from the wall.

  8. Form up the slab-on-ground and suspended slab.

  9. Pour!

In preparation for step 5 (who says I don’t plan ahead! Wait, what’s that? A water tank? Oh…) I’ve been spending some time in Sketchup, modelling the hillside and the cutting I will need to make for the slab.


While onsite on Sunday I measured the extent of the slope above the retaining wall and came up with around 12º. No, I didn’t use a protractor or a sextant, or anything as quaint as that - I used my Swiss Army Phone. I love technology, my phone has a 3-axis accelerometer which enables a spirit level app to measure the precise angle at which the phone is being held. Lining the phone up with the water level in the tank produces a 12º downslope!


Armed with that little gem, and placing a laser level on top of the rammed earth wall I very easily measured the point at which the suspended slab will intersect the hillside. Putting these two numbers together with my 3D building model in Sketchup produced the following:


Gotta love technology! :)

Sunday, July 8, 2012

More beautiful weather, but...

.. but the tanking membrane hasn’t cured yet. This stuff goes on a dark green colour and dries jet black, and in the upper reaches of the wall it’s cured nicely. Trouble is, below the level of the hillside it’s quite a lot cooler and so the membrane is still showing green in quite a few places.


This is going to prevent me from applying the second coat today. Cue the mock disappointment…


Still, there’s lots to do especially with the fantastic weather. First on the agenda is to clear the first floor hillside of scrub so I can measure and set out the extent of the slab-on-ground. I also need to finish levelling the tops of the rammed earth walls, and cut a rebate on the suspended-slab side for the insulation-slash-formwork.


Doesn’t sound like much, but this little lot will keep me busy all day…

Saturday, July 7, 2012

At least the weather is cooperating


The first full coat of tanking membrane is complete, and with any luck I’ll be able to make a start on the second coat tomorrow.

Flash!

So this morning, while waiting for the temperature to climb ever slowly above 8ºC (this is the minimum temperature at which the tanking can be applied in order for it to cure) I got on with the job of fitting the retaining-wall-to-container flashing.


Very tidy, even if I do say so myself :) Much, much more sensible than trying to mortar in small pieces of rock, and much easier to waterproof. This has a big fat bead of liquid nails behind each end which will in and of itself seal the joint, but I will make sure all the gaps are well and truly covered with the tanking membrane as well.


With that done, there’s really very little else I can procrastinate with before I have to squeeze in behind the retaining wall and finish this effing tanking layer… Oh well, sooner I get started, sooner it’s finished.

Friday, July 6, 2012

Tanking

There’s a word in the English language which I don’t like to use very much, if at all. Not because it’s particularly difficult to spell or challenging to pronounce - in fact, it’s rather succinct and actually describes a place which I’m sure most men would agree is rather a nice place to visit. However, unless one is participating in redneckery it’s usually inappropriate to use it in the company of others.


That’s what sort of a job this retaining wall tanking has been today.


I’m using a water based product, which describes itself as a “one part latex-modified bituminous elastomeric waterproofing membrane”. Personally, I’d use rather fewer but somewhat more colourful adjectives but to be fair, there are far worse things to paint a wall with.


The biggest contributor to this job’s declaration as a colloquialism for a location in the female anatomy is the fact that there is very little room between the retaining wall and the hillside cutting. In places there is no more than 300mm, and squeezing in there sideways with a paintbrush dripping in a fluid designed to stick to anything, trying to thoroughly and completely seal the joint between the first course of blockwork and the slab is less than comfortable. I will be peeling this stuff off my hands for weeks to come, I’m sure. If I have it in my hair, it will remain there until it gets cut off.


Above the first course of blocks I’m applying the sealant with a paint roller and extension pole from the hillside which has actually been reasonably straightforward, if not terribly speedy. The problem with pace has been that the dry-stack blockwork I’ve used to construct the wall forms a 3 or 4mm wide vee between each block, which has to be filled with sealant in order to seal the wall. Ensuring that every joint is sealed from my position on the hill has been challenging, but I’ve attacked this problem by slathering the stuff on thick with two coats.


So I have a little over half of the wall coated, and the wall-to-container flashing prepped ready to go on first thing in the morning. I have also to tank the remaining three sevenths of the first course of blocks but I will have plenty of room to move along this length of wall so the rest of the job should require much fewer colourful adjectives than has been the case today.


At least it’s been beautiful weather today, with the promise of the same tomorrow :)

Wednesday, July 4, 2012

*crickets*

Wow, it’s been a little quiet around here lately!


Since completing the rammed earth, I’ve been a little lacking in momentum on the building site. I’ve not made a very good transition from the single-minded purpose that the last month or so of earth ramming has required and so not a lot of progress has been made.


The weather has been somewhat unfriendly too, so I can divert a little of the blame there :) It is difficult however when we get fine sunny weather during the week, and solid rain for the three days I’m able to spend on site…


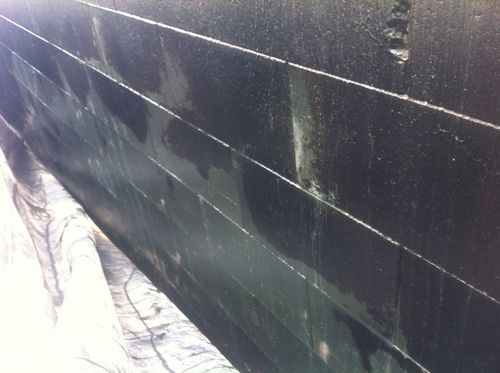
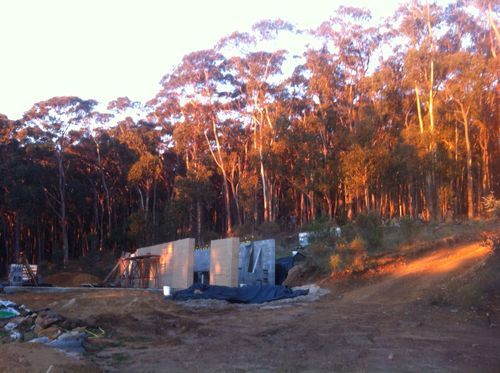
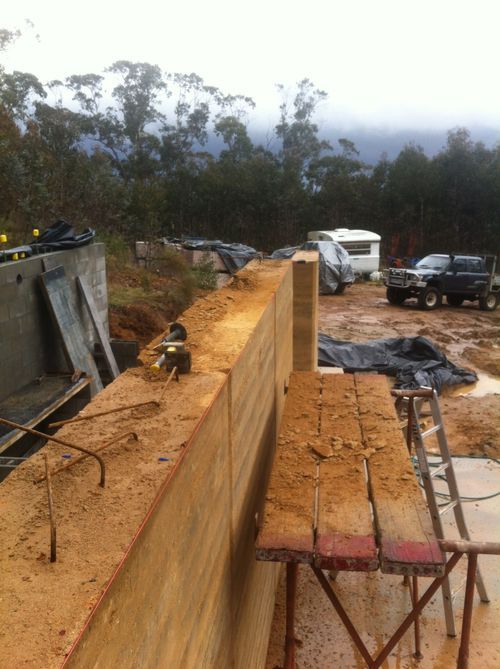
In any case, the rammed earth has turned out beautifully. I couldn’t be happier with it:


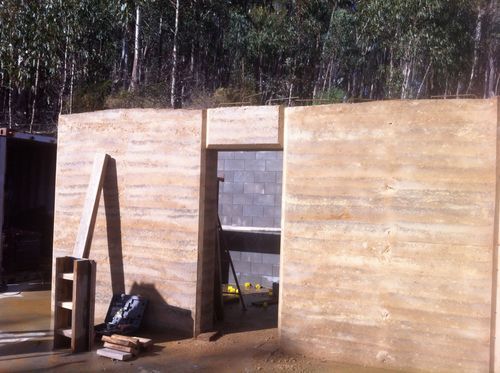
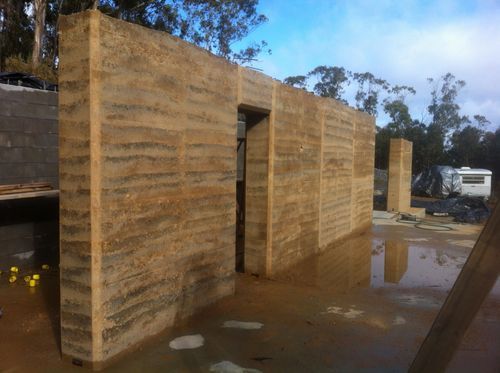
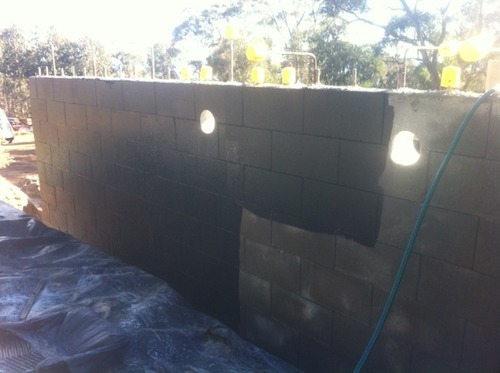
My only real concern with them is … drum roll … the weather. Not because I think they’ll suffer being exposed; I’ve used enough Plasticure in the mix that I’m certain they’re weatherproof. Rather, my concern is that the slab around the middle of the wall is a bit low, so water tends to pool there up to a centimetre deep. You can see the effect in the photo above - a little moisture creeps up the first 5cm or so of wall, and it’s staying wet. The worry is that the constant moisture will reverse the effect of the cement in the mix, destabilising it.


I’ve been wondering how to deal with this and seal the base of the walls against the pooling water, and I think I’ll just go with the obvious approach - silicone. I’ll run a dirty great bead of the stuff all the way around the base, up to about 2cm high which is above the high water mark. With any luck this will keep the majority of the water away from the wall until I can get a roof over them. If I’m heavy-handed enough with it I should be able to remove it later without leaving very much behind, if I’m lucky.


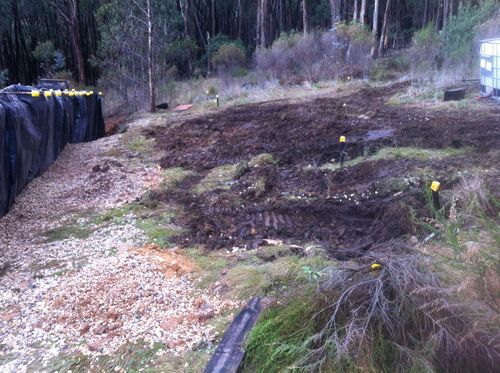
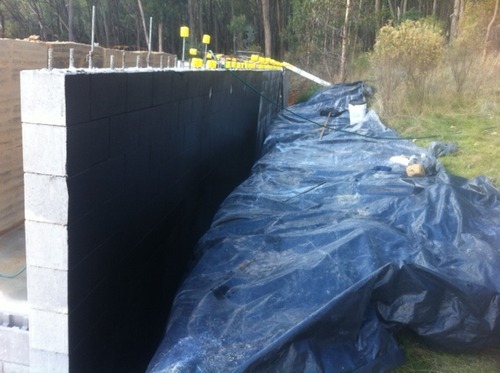
So, with the rammed earth done I’ve been lining up my other ducks in readiness for digging the upstairs foundations in the hillside. Primarily this means applying the tanking system to the rear of the retaining wall so it can be backfilled, but there are a few fiddly things to take care of before I can do this:


  1. The vents for the battery room need to be bored.

  2. The rear of the shipping container needs to be rust treated before I can seal it with the tanking system.

  3. I need to deal with the gap between the retaining wall and the shipping container.

Last weekend I took care of job #1. I had originally planned to bore these myself, but the right gear wasn’t available to hire locally so I was referred to a company in Seymour who specialise in cable and trench laying, but who also have the equipment for concrete boring as part of that job. Luckily they had a “down” day on Friday from their usual Docklands job and were available to bore my holes at short notice.


It took two of them the better part of four hours to cut four 100mm holes, working mostly in the rain under the cover of a leaky, wet blue tarp, with my generator tripping its circuit breakers every few minutes.. but we got it done:


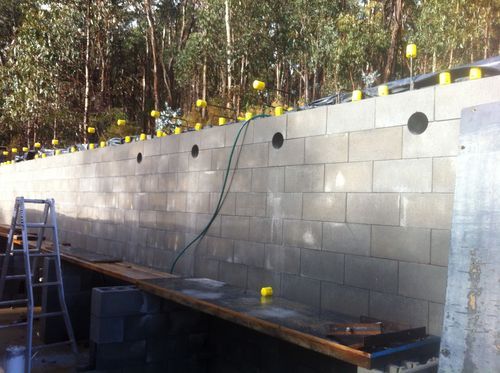
$100 per hole! I wasn’t particularly happy with the quote when organising it, but after seeing how much work this was and the equipment involved, I know they’ve earned their money. This wall is tuff stuff… it made short work of their diamond-tipped auger!


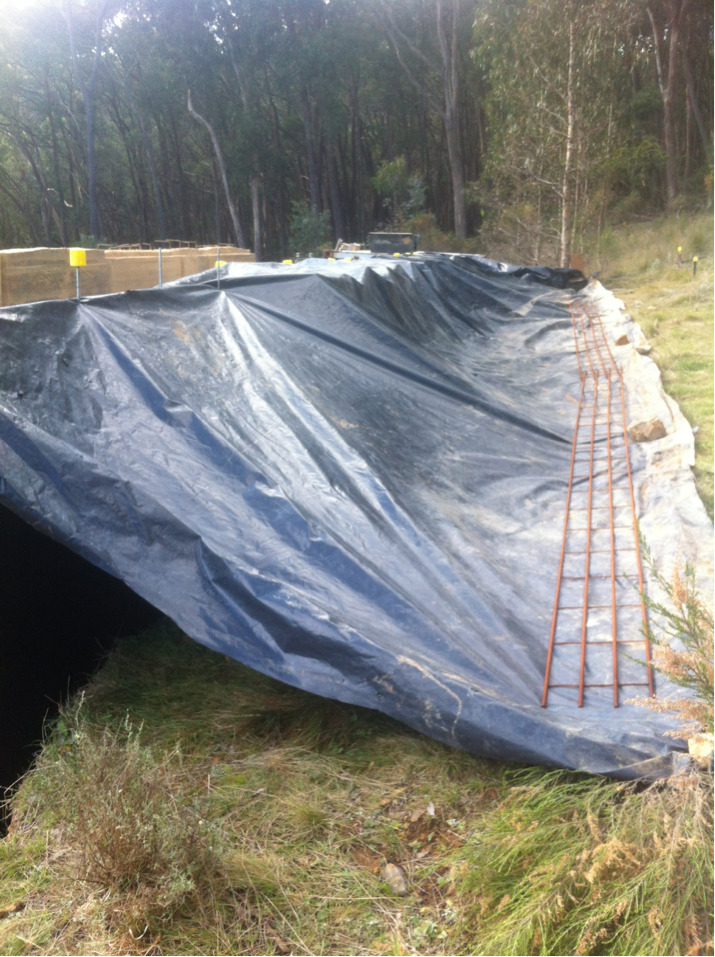
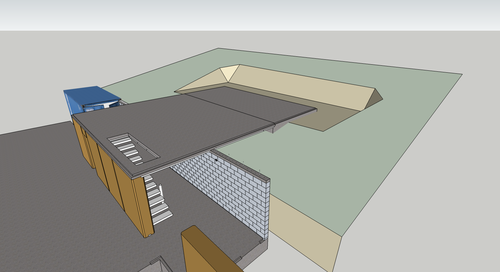
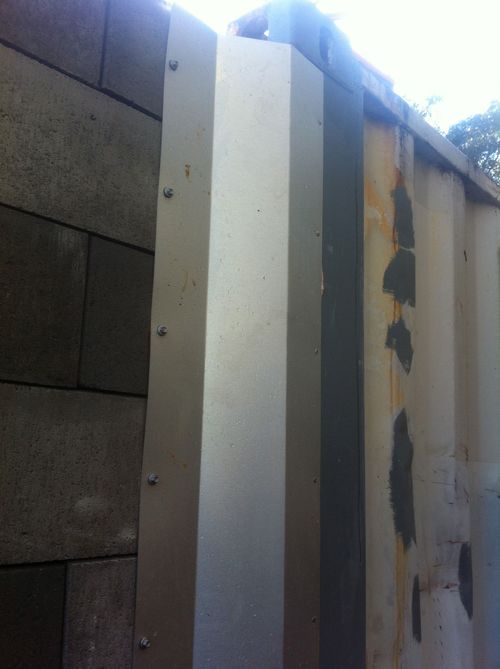
With Friday done and dusted I turned my attention to planning for tanking the back of the wall. The biggest question mark has been how to manage the gap between the wall and the container. I had originally thought about building a little rock infill wall, but after having had a close look behind there I’ve had second thoughts. The gap is only 100mm wide and the container steps back by 70mm, so there’s not really very much of a gap to bridge and rockwork would be very fiddly at that scale:


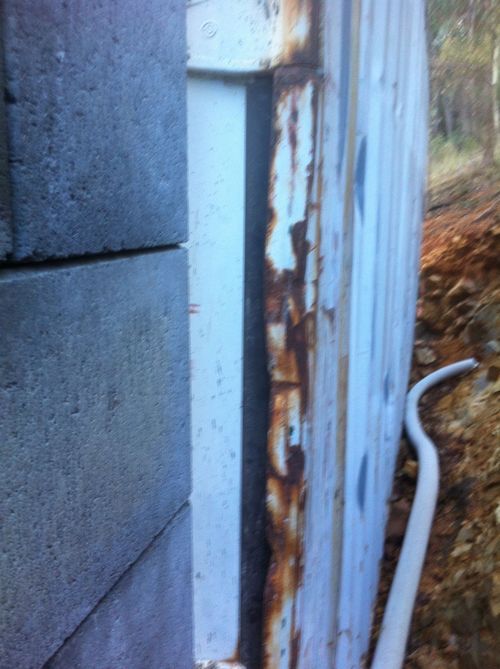
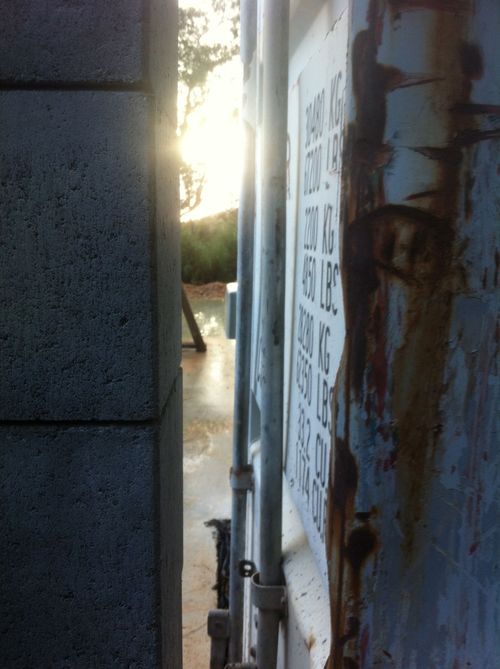
It was quite difficult representing the size and shape of the gap on camera, but looking at it from this point of view I figured I could probably cover this with a length of galvanised steel, since it really only has to keep a small amount of backfill at bay. With that in mind I paid a visit to Reece in Seymour to see if they had anything suitable (and naturally they don’t) but they are able to have sheet zinc steel bent up to my specification, so I’ve supplied them with the following drawing which they’re turning into reality for me:


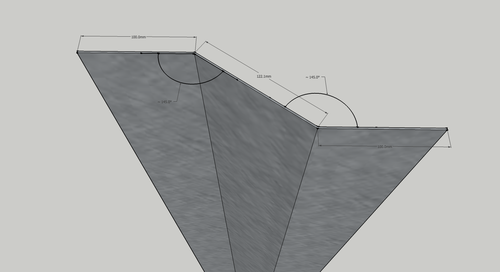
This will be screwed and liquid-nailed to the wall and container, and the tanking sealant will go over the top of the lot.


The other little job needing doing is the tops of the rammed earth walls. When these were rammed, by the time I got to the top it was dark, cold and late and so all I wanted to do was be finished. This meant that I didn’t pay a great deal of attention to the accuracy and level of the finished wall - I made sure it was high enough (or slightly over) and pledged to deal with it another, warmer day :)


Well, that day has come (and gone), and I spent it with a brick bolster and lump hammer, chipping away at the tops of the walls. Any doubts I had (and I must admit, I did have them) as to the strength of my rammed earth have been well and truly dispelled - this stuff is hard! It’s taken me the better part of a day to complete one half of the wall, and this is the easy half.


The back half of the wall I’ll attack with a dirty-great masonry disc on the angle grinder, since along much of the length I need to cut a 100x50mm rebate in which the polystyrene insulation / forms for the suspended slab will nestle.


So the upshot of all of this is I feel like I’ve got my momentum back. I’ve addressed all the little “how am I going to do that?” roadblocks and so with the promised favourable weather this coming weekend I’ll get two coats of the tanking sealant on the back of the retaining wall, after which I can finally get the drainage layer backfilled. After that there’s nothing stopping me making a start on the first floor earthworks! :)