It looks like I'm not going to get a lot done this weekend. I arrived last night to some of the thickest fog I've ever experienced - I could barely see the road in front of the Hilux, and on at least two occasions found myself driving into the ditch at less than walking speed!
Aside from that, it's wet! I don't have a rain gauge yet, but there must have been a fair bit of rain yesterday because the whole place is a soggy muddy mess and although there was no rain today (so far) the Bureau thinks it's going to belt down tomorrow, so it's going to get worse before it gets better.
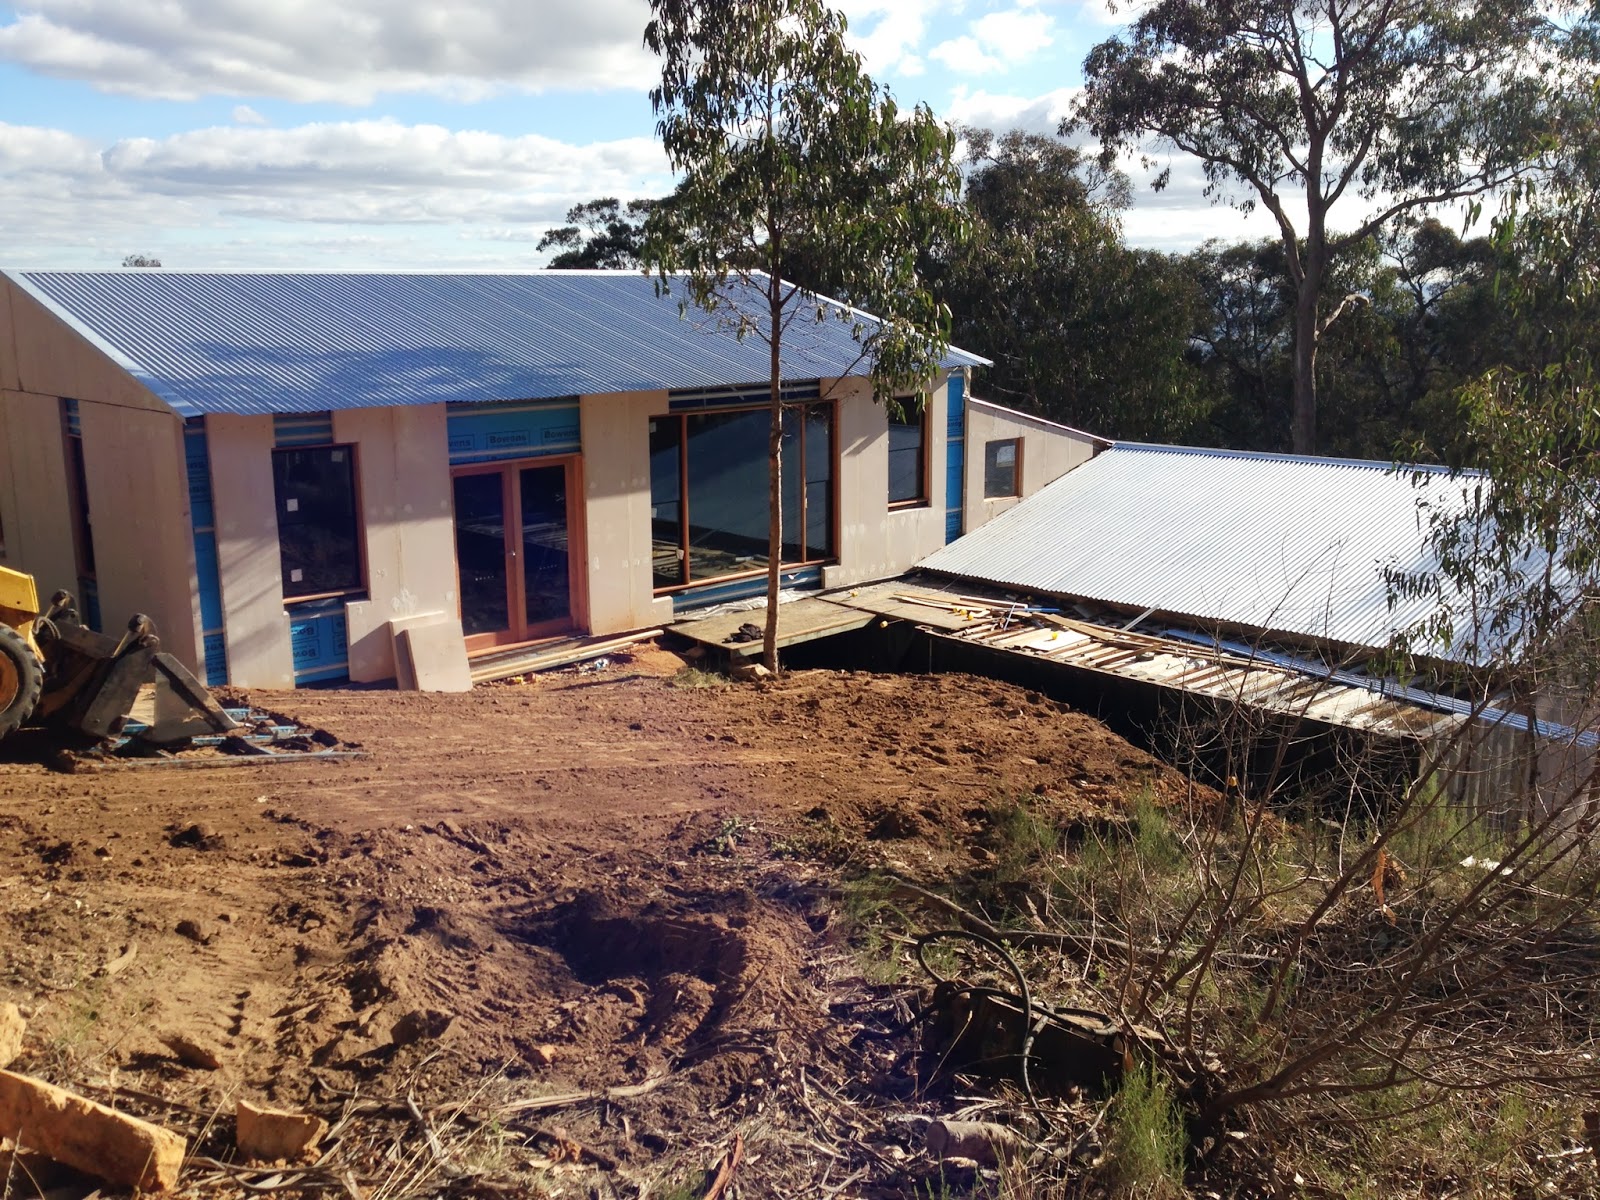
The wet meant that the gravel delivery I had tee'd up didn't happen - there's no way a truck could have got back out of the building site, so it was called off. Add to that that the solar electrician called off his visit too as one of his kids was sick, and it's been a slow day.
At least Savva the Plumber showed up! He spent the day inside upstairs completing the water and gas plumbing, and setting up the laundry trough downstairs. He'll be back during the week when it's drier to finish off the roof flashing, and then hopefully again the week afterwards to begin (and complete!) the sewer install and possibly even the solar hot water service.
If it's not too atrocious tomorrow I'll see if I can't pick up some old railway sleepers, to use as a frame for my water tank stands. I don't know how much else I'll get done...
Friday, May 31, 2013
Monday, May 27, 2013
Lots of planning
On my plate at the moment, in no particular order:
- Finding a CEC-approved electrician to discuss our solar & electrical install. Why won't anybody answer their phone!?
- Finalising the solar PV system design and purchasing all the bits.
- Finding someone to render the Hebel walls. This is one of those jobs I could probably do and would probably be good at, but I wouldn't be good at it until the end of the job. Better for someone else :)
- Finding someone to polish the concrete floor of the unit. See previous job.
- Sourcing steel door jambs for the big garage doors and pump room door.
- Designing & building the garage doors.
- Sourcing rainwater tanks.
- Sourcing railway sleepers & crushed rock for the tank stands [mostly done].
- Sourcing the solar hot water service.
- Figuring out how best to attach the rainwater guttering directly to the tin sheets. I had hoped to have a custom quad profile made up with a little return at the rear into which we could screw, but that plan has fallen through. Plan B involves rivetting a 90º angle to the back of the gutter and screwing that to the tin. We'll experiment with this on Friday when Savva is on site.
- Organising the septic system installation.
- Finding an affordable plywood internal lining system which suits 2700-high walls. Easier said than done.
- Finding an affordable source of miniature orb corrugated sheet. Definitely easier said than done.
- Finish installing all the little fiddly Hebel bits and pieces
- Seal up all the expansion joints and around window and door frames with the fire-proof polyurethane sealant.
- Finish backfilling against the shipping container.
- Finalise plans for the concrete slab over the container and onto the hillside.
- Build the forms for, and then build the internal rock wall down the spine of the dwelling.
- Design and have quoted the 2mm steel flashings we need on the external timber faces of all window and door frames.
- Find a supplier of stainless-steel fly wire screens.
- Find a supplier of BAL-FZ compliant fire shutters.
Once I've done all that I can think about beginning the internal fitout...
Did I mention our building permit expires in early August!?
Sunday, May 26, 2013
More earthworks
The bobcat put in another hard day's labour today, tidying up the side and preparing for the installation of a couple of water tanks. First up was to take a chunk out of the hill behind the shipping container, in order to nestle the tank in nice and close, out of the way.
I didn't get as much out as I wanted, because right about here there's a big seam of rock in the way. This seam has been in my way pretty much every step of the way - it got in the way of the shipping container and retaining wall, it got in the way of the upper slab-on-ground footings, and now it's in the way of my tank stand.
With my back being as sore as it is, I chose not to fit the rock breaker and so I just chipped away at it with the backhoe bucket. I got enough out to keep me happy, so it'll do :)

The next job was the spot outside the pump room, which is where I'll be siting a slimline tank to catch the rain off the south facing roof slopes. Ultimately I'm going to trim the hillside back even more than I have now and build a little curved rock retaining wall to pick up the line of the road, but this'll do for now.

I took the opportunity with the spoil to bring up the level of the forecourt outside the garage a little, in preparation for laying down some crushed rock. I do love having the bobcat and spreader bar; it makes this sort of job a pleasant one :)

Saturday, May 25, 2013
Bobcatting
I managed to tweak my back a little bit yesterday, moving one of the massive boulders which I pulled out of the ground when I excavated the slab footings last year. I didn't need to move it far; basically just rolling it once or twice so I could reach it with the bobcat, but in the process I must have overdone it a little as I've been moving like a question mark ever since.
With heavy lifting out of the question (what a shame, no Hebel!) I decided to spend the day on the bobcat and complete a couple of earthmoving jobs that have been sitting waiting for a while. First off was backfilling against the shipping container with the remainder of the 20mm gravel I had on hand - pleasantly, I had more in the pile than I thought was there and I got enough depth to begin backfilling for real.

An hour or two of earthmoving - gently gently on the hillside, as all the bobcat wanted to do with a full bucket was buck its rear wheels into the air - and it's looking much better. I need to finish installing the Hebel above and below the big window before I backfill any further, but that's not going to happen this weekend.
The next job for the bobcat was clearing and levelling the area behind the garage, so I can set up a pad onto which we can install the first of our water tanks. For these, I plan to construct a frame-on-ground using old railway sleepers, then fill inside the frame with crushed rock and pack it down hard to give us a solid tank stand that should be pretty immune to being undermined by water.


I will need to hitch up the backhoe attachment in the morning and take a bite out of the hillside behind the shipping container, in order to nestle the tank in there out of the way.
Friday, May 24, 2013
Last of the glazing
After a false start last week - the double glazed unit apparently wasn't finished in time to make the delivery truck to Shepparton - the glaziers arrived today with the big pane for the upstairs window.
Heavy, too - around 150kg!
It took four of us to carry it from the trailer to the building, and I then got out of the way of the professionals and let them install it.


Heavy, too - around 150kg!
It took four of us to carry it from the trailer to the building, and I then got out of the way of the professionals and let them install it.


Voila!

For the rest of the day I studiously avoided all things Hebel and instead got busy preparing the area outside the upstairs unit, which will be (along with the shipping container) covered with a concrete slab to form an outdoor patio area.
First up, there were a few young saplings which needed to be removed. I really hated doing it, but they chose to grow in possibly the worst available spot and so I strapped them to the bobcat and just pulled them out of the ground.
With the space clear I began to weigh my options in terms of what to attack first. The space between the cutting and the shipping container needs to be filled with gravel, but before I can do that I needed to waterproof the container with a tanking membrane.
Ugh, that tanking membrane - the one which flat-out refused to cure about this time last year, because the temperature was too low. How is it that I've managed to wait until now to attempt this job again!?
Anyway, in the spirit of doing things in the correct order (not always my strong suit, that) I bit the bullet and dug the half-a-drum of the latex/bitumen coating out of the container and got my roller on.
Whaddya know, it's warm enough still for this stuff to cure! :)

Tomorrow I'll backfill the void there with the gravel I have on hand. It won't be enough to finish the job, but I'll have 20-or-so truckloads of the stuff arriving in a few weeks to fill the sewer trenches, so I dare say I'll be able to nick a little of that to finish backfilling against the container.
Saturday, May 18, 2013
Not a lot done today
I think it's shaping up to be one of those weekends. After arriving after lunch yesterday with only a few hours of daylight, today I faced the dreaded Hebel. Working with this stuff honestly drains my will to work, and I spend half the morning wandering around aimlessly looking for something else to do.
Unsuccessfully, regardless of the fact that I have a to-do list as long as my arm.
In the end I finally relented and managed this:

Unsuccessfully, regardless of the fact that I have a to-do list as long as my arm.
In the end I finally relented and managed this:

Not a great deal of forward progress, but one less Hebel job left on my list at least.
Tonight I need to rev myself up to climb on the bobcat in the morning, and begin clearing the hillside next to the building in preparation for setting up the patio slab.
Friday, May 17, 2013
An update on the glazing
The sashless unit installer finished up the garage windows on Monday in my absence, so we now have a full complement of double-hung windows installed. They're a beautiful thing :)
I had been expecting the second glazier to arrive today to install the big fixed double-glazed unit upstairs, but I got a call from them yesterday advising that the unit hadn't been finished in time to be loaded on the truck for delivery to Shepparton (all this subcontracting.. who knows where it's all coming from) and so that one will be deferred until next week.
So with no pressing need to be onsite at sparrow's this morning I decided to spend the night in Melbourne and come up this morning instead.. which meant I didn't actually arrive until about 1pm and so my day was rather truncated.
I did however manage to finish installing the rear garage door - I began hanging it last week but ran out of day, so today I got the door furniture all installed and set it up square, then gave it a coat of linseed oil. Is nice!


The rest of my weekend will be spent finishing off the little bits of Hebel I still need to do (ugh) and when, not if, I get sick of that I might begin excavating the hillside beside the upstairs unit in preparation for setting up the concrete slab over the shipping container, which will form an outdoor patio area.
Thursday, May 16, 2013
Solar Power
With the project progressing steadily towards lock-up, I've spent a lot of time this week researching solar power with a view to engaging an electrician in the next few weeks to begin the electrical install.
As may be evidenced by the fact that I'm building most of this place myself, I'm not the kind to go shopping for a "package deal" solar installation - I prefer to understand the intricate details, and then design and build a system myself. I know I'll have to use an electrician to install it, but I prefer to do the thinking myself for free, rather than pay someone else to think about our design for us.
With that in mind, I've been looking at the various components we'll need for a completely independent off-grid setup. I can't remember whether I've mentioned it here before, but we're probably 1.5km at least from the nearest power pole through dense, steep forest, and so the cost of connecting mains power to our site is prohibitively expensive - and completely contrary to the spirit of our project, which is to build a completely (or as close to completely as possible) self-sustaining home.
To say this research has been bewildering is an understatement. When you go looking, you find available solar panels of a thousand different types, batteries of a thousand different varieties, inverters (grid-connect or otherwise), panel inverters, inverter/chargers, charge controllers (diversion or disconnect), dump loads, battery chargers and generators. There's AC coupling, DC coupling and grid connect.
What's worse, nearly all the literature you find in Australia is relevant only to grid connected solar installations, since these are by far the most common - evidently there are only about 12,000 off-grid solar installations in the country. So finding my way through this mess has left my head spinning just a little bit.
But to paraphrase the wise and ancient Yoda: found my way, I have.
In a stand-alone solar power system (SAPS, or remote-area power system, RAPS) you basically need solar panels (duh) to charge a big-ass battery, and an inverter to take the DC power generated by the panels and stored by the battery, into AC power for household loads. In the simplest (and ironically, most complex to design) case you need just that, and a charge controller which is a device whose basic role is to prevent the batteries from being over-charged. This is a DC-coupled system - the panels, which generate DC power, are connected (via the charge controller) directly to the battery, and the inverter takes that low voltage DC power and converts it to 240V AC (in Australia and most of the civilised world ;). I have a miniature version of this exact setup in our caravan: one panel, a dinky charge controller, a deep-cycle car battery and a 150W inverter. It works.
Where this simple architecture becomes complex however, is that in order to maximise the efficiency of the system you have to very accurately match the characteristics of the solar panels to those of the battery array, taking into account factors such as temperature (which affects the panel output), loss in the low-voltage / high-current wiring, and the expected decay in energy production (and storage) over the panels' and batteries' lifespan. With so very many different panels and batteries on the market, finding a perfect match at a great price is quite literally like finding a needle in a haystack.
Too hard.
This is where the professional solar installers make their money, I think - they've already invested time in this thinking, and pass that cost in $$ on to buyers.
There is an easier way, however - the AC-coupled system. In this design, you need panels, batteries (again, duh), but two inverters; one of which is a common (and therefore relatively cheap) grid-connect type, the other an inverter/charger. The grid-connect-type inverter is called a panel inverter in this architecture, because its sole role is to take the low-voltage DC power generated by the solar panels and turn it into 240V AC to directly power the household loads. Any excess power generated is then used to charge the batteries via the inverter/charger but if there's a deficit of solar power, the inverter/charger draws power from the batteries and supplies it to the household as 240V AC. Many inverter/chargers also have the capability to automatically start a backup generator as well, if the available battery power is too low.
The beauty of an AC-coupled system is that you don't have to match the solar panels to the batteries, because they're isolated from each other by the 240V circuit. You do need to select panels appropriate for your panel inverter (and likewise batteries to an inverter/charger) but these are far, far easier to match and therefore easier to find at a good price. An AC-coupled system is potentially slightly less efficient than its correctly matched DC equivalent, but when you take into account high-current DC transmission losses in long wiring runs, it probably evens out and you could make up for this inefficiency by simply adding another inexpensive solar panel.
So it's no surprise then which architecture I'm leaning towards :)
In my digging around online without actually calling anyone, I've found a couple of component suppliers who seem to have the right gear at the best price. What I've arrived at (so far) is:
- 250W, 49V solar panels - $249 ea, via Low Energy Developments
- Surrette 6V, 600Ah batteries - $703.92 ea, via Apollo Energy
- SMA Sunny Boy 3kW panel inverter - $1609.00, via Low Energy Developments
- SMA Sunny Island 48V, 5kW inverter/charger - $4477.00, via Low Energy Developments
There certainly seems to be a trend developing here in supplier :)
With our projected energy budget of 6.5kWh/day, I've arrived at a 48V system comprising two strings of 8x6V batteries (for a total of 1200Ah capacity), coupled to 2.5kW of solar capacity (10x250W panels) which should hopefully give us 7.5kWh/day of generation on average. If we can keep our energy use within our budget, this system should give us at least three days of autonomy with effectively zero solar generation, before we'd need to start the generator (based on depleting the batteries only to 50% charge, which keeps them healthy).
Based on these prices (which I may well be able to beat) we're looking at nearly $20,000 not including installation, wiring and ancillaries such as switchboards. Certainly better than the $30-$40k I've seen advertised for 6.5kWh/day systems...
Just don't get me started on the Australian Government's rebate schemes and carbon pricing (STCs)...
Friday, May 10, 2013
Beautiful, beautiful glass
The glazier arrived this morning, early to begin the installation of the sashless units in our frames. I shouldn't be surprised, but I find it so much easier to get out of bed in the morning when I know I have someone arriving to work on site! :)
As I've never installed them before, I was certain that I'd need to make some running adjustments to the fitment of the window frames to accommodate the sashless glass units, but to my not insignificant surprise the fitter had no problems whatsoever installing them, with virtually no adjustment necessary!
I don't know what it is, but I must be doing something right!
The units went in in halves:


.. and the finished product!


The top and bottom leaves of the window are connected with sash cords, so when we lift the bottom pane, the top pane drops by the same amount. Cracking the windows open top and bottom in this way will be fantastic in summer evenings, allowing hot air to escape at the top and cooler air enter the building at the bottom.
That's the theory, anyway :)


I spent most of my day (attempting to) install the upstairs double doors. Don't be fooled by this pic.. they're actually just propped there and not yet hung.

These have been giving me nothing but grief. Although the frame is perfectly square measuring identically on each diagonal, the doors just don't fit very well. Something's not square, and I don't know what it is - I can get one door spot on, but then the other is miles out. I eventually ran out of light (and not patience this time, surprisingly) and had just enough light to snap one more picture of the windows :)
I'll fight with them again in the morning, after I pay a visit to a timber yard in my search for some hardwood slabs to use as stair treads :)

I love having glass!! It finally feels like "inside" upstairs! :)
By about 3pm the glazier finished up, and he'll return on Monday to fit the garage glass.
Monday, May 6, 2013
All done!
The last of the frames went in yesterday, mostly without a fight. There was a little tweaking of the stud openings for the last two (the big upstairs window and its neighbour) but nothing too painful.


I'm particularly pleased with the fit of the big window frame - I was convinced my stud framework was out of square (even though I measured it and braced it before it was erected) and because the big frame is perfectly square and braced thus, I was sure it wasn't going to fit - especially with only 10mm of wiggle room in each direction. There was a little bit of tweaking required with a planer, but not much!
So with all of the frames installed, today I booked the glazier to install the sashless units on Friday this week, and the big double-glazed fixed central pane of the upstairs window the week after, which will give me time to build a platform over the void underneath the window. This pane alone weighs in at about 150kg, so it needs to be solid...!
My next task is to design and fabricate the frames for the garage barn doors. Once I have these done (and the pump room door) then I'll be all locked up!
Saturday, May 4, 2013
A few more window frames
A few more window frames installed today - five of the eight windows upstairs in, plumbed and square!


There was a little bit of stuffing around with the Hebel today, but by and large the panels in this part of the building were close to the right size and in the right place :)
The three I have to do tomorrow however... one will require the circular saw, as there's at least 200mm width of Hebel to take out. The second is the biiiig 3.2 x 2.1m window, which I can't lift by myself and will need help with.. and the third - I have no idea if that one will be easy or difficult :)
One little win today however was the fit of the frames in my openings upstairs. These were the first stud frames that I put up, and in my inexperience I sized the openings to the sizes on the working drawings - without allowing "wiggle room" for the window frames to be plumbed and squared. Thankfully when I met with the guys from Homeview Windows when I placed the order, we discussed this little problem and they sized the window frames accordingly. As a result these are a little smaller (10mm) than the windows downstairs, but they went into the openings without a fuss. So far I've been extremely impressed with these guys - let's see how this holds up when the glazing happens :)
Friday, May 3, 2013
More frames
Back into it again this morning, and I'm determined to get all the window frames installed this weekend so I can get the glaziers out to install the sashless units. The closer I get to being locked up, the sooner I want to get there!
I've settled on my method for adjusting the Hebel at the window openings, after stuffing around with my technique on the first couple.
First, I sit the frame more-or-less in position, and measure it across the diagonals to confirm that it's perfectly square. Then, I shuffle it over so that it's as flush with one side of the Hebel as possible (each window opening has one panel which has been cut, and one which has not. It's easier cutting the one which hasn't yet been cut, since there's no rebar for the first 80mm or so of panel), then mark off the position of the frame against the panel I'm going to cut.
Once I've transferred that position to the outside of the panel, I'm then making a few horizontal cuts with a jack saw down to my mark:

.. and then breaking the sections off with a chisel, and using the chisel to tidy up the cut.


This gives me a nice clear straight starting point for my main cut, and I just follow my line with a jack saw.
This has to be the only time I've ever enjoyed working with the Hebel panels. Cutting them this way is a joy; the hand saw rips through the AAC with ease and leaves a nice smooth, clean and straight surface. I'm not however very good at keeping my cut square front-to-back, so I have to go back afterwards and fix that up with the saw and a sanding float; not an issue really as it's only the outer edge of the cut which will ever be seen - the rest is concealed by the window frame.

With the frame installed, it's starting to look the goods! :) The frames will be sealed to the Hebel panels with a fire proof polyurethane sealant.

So with my technique sorted out, I managed to finish installing all 8 window frames in the garage and in the dying daylight also installed the 900x900 fixed pane window in the roof section. They're all as square across the diagonals as I can measure, so with luck that's good enough for the sashless units!
Tomorrow's job is to break the back of the upstairs windows.
Subscribe to:
Posts (Atom)