… is “Use the right tool for the job”. This will become apparent a little later…
For the eastern-most retaining wall which supports the upstairs suspended slab, our engineering drawings specify a 300-wide concrete cavity wall, reinforced with SL918 mesh. For the life of me, until earlier in the week I couldn’t figure out how this was going to work. Firstly, concrete blocks come in 190 or 200 widths, not 300.. and there would be no way possible to install the blocks with steel mesh reinforcement. I pawed over the spec and the working drawings for ages, but couldn’t figure it out until I finally realised that the drawings were specifying two skins of 90w concrete bricks with a 120w cavity between, which would be filled and reinforced.
For some time, Peter and I have been discussing the use of a Boral concrete block product, Connex, to build the retaining wall. This is a dry-stack system, in which the first course is mortared to the slab but then the blocks are just stacked like Lego and when the wall is complete, filled with concrete grout. This is much easier for a complete novice like me to build (correctly), so this is the way we’re going.
So, during the week I ordered the concrete blockwork. I tried my hardest to buy the Boral Connex product, but of the three closest Boral suppliers I contacted, one had never heard of Connex, one wanted to charge me a fortune and the other supplied a competing product from Adbri, called Versaloc. These were lots cheaper than the Connex, and they could deliver on Friday (today) so they got the nod. Both Adbri and Boral supply detailed technical manuals for building with these blocks, specifying reinforcement and fill requirements for different use cases - one of which is a “basement” retaining wall, fully propped by a concrete slab floor above. This neatly describes exactly what we’re doing with this wall, so I’m going to deviate from our plans and build it to their spec. I don’t think the building inspector will mind……
So today, my day started with a plan. This was:
- Form up a little earth ramp up to the slab, so it’s easy to drive the bobcat (or the Hilux, or other equipment which may or may not be delivering concrete blocks) up onto it.
- Set up a string line, find the right level for the first course of concrete blockwork, and figure out the layout.
- Drill the holes needed for the additional starter bars (when we poured the slab, we should have cast in ligatures at 200mm centres for both this wall and the western rammed earth wall, but we didn’t have enough. Hence we set them at 400 centres, and will chem-set N12 bars in at 200 centres).
- Cut the starter bars and chem-set them into the slab.
- Lay the first course of blockwork on a mortar bed.
Like all good plans, this one went out the window reasonably quickly. Things started well enough as I managed to get the ramp formed up and compacted nicely, using the Right Tools For The Job - the bobcat and whacker, both cheap scores on eBay. I got my level sorted out and figured out what holes I needed to drill, but that’s where the day started going downhill.
Several years ago I bought a cheap Ozito hammer drill and had planned to use this to drill the holes for the rebar. It managed the first two OK, but then the variable-speed trigger started playing up and it completely failed part way through the third hole. Did I mention I have 34 holes to drill? This patently was not the Right Tool For The Job.
I needed to make a trip into Seymour anyway to pick up the chem-set (an industrial-grade epoxy resin) to fix the bars into the slab, so while there I stopped by the hire place and grabbed a rotary hammer. This was a very good thing - the Right Tool For The Job! :)
Shortly after I got back, this lot arrived! :D
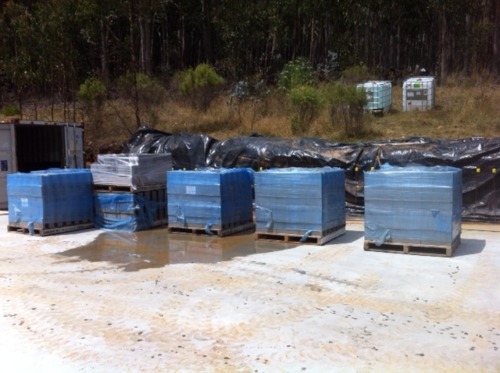
Five hundred and sixty concrete Lego blocks :)
Drilling the 34 holes in the slab however took quite a bit longer than I’d hoped, and it was 4:30 before I was able to start setting the bars into place. The epoxy for this comes in a caulking-gun tube in two parts, which are mixed in a funky nozzle when dispensed. Each hole didn’t need much, but wow does this stuff go off FAST! I initially filled about 10 holes, then went back and hammered the bars into place but by the time I’d done that, the epoxy had set hard in the nozzle. Luckily the tube was supplied with two nozzles, so I changed it over and learned my lesson, only setting two or three bars at a time before dispensing more epoxy.
An hour or so later, and voila!
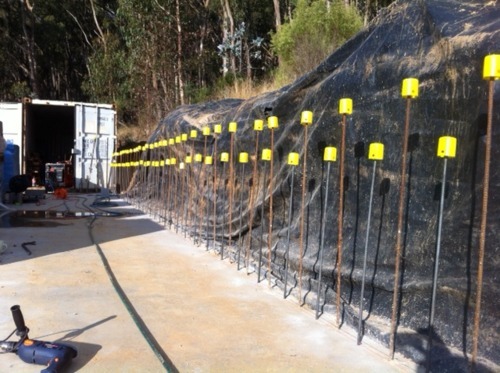
All set now to start laying the first course of blockwork in the morning :)
No comments:
Post a Comment