After deciding on the layout of the rammed earth wall, I’ve been thinking long and hard about how to build it. This has involved some discussion with Bluey from the BYOHouse forum, who has nearly completed his rammed earth home and has some fantastic insight into the construction methods.
My first concern with the wall construction was the formwork. My little test “wall” taught me a few valuable lessons:
- The forms cannot be too strong.
- They need to be anchored securely to the ground, and kept absolutely plumb.
- Thought needs to be paid to their ability to stack, or at least be raised as the wall grows in height.
- Did I mention they’ve gotta be strong?
I have been considering ways to anchor the formwork to the slab, but I really don’t want to place temporary fixtures in the surface. I mentioned this to Bluey and he described in detail how his forms were built, and how he anchored them. In his case he had strip footings to clamp to, but since I don’t have these he suggested fixing them internally using steel angle. I had been wondering how to use the steel rebar which will be set in place to anchor them, but the steel angle idea is so much simpler and really quite neat as they remain in the wall permanently, and will be largely invisible when the walls are complete.
In any case, rather than reinvent the wheel I’ve decided to base my form designs on Bluey’s, which have been proven to work and produce a good result. One aspect of his design that I particularly like is that there are no through holes in the surface of the wall for the bracing rods, since they pass through the control joints instead. This means that there are fewer obstructions to ramming the earth, which when the wall is steel reinforced is a blessing as there’ll be enough in the way as it is.
With all that in mind, here’s how I’ll go about it.
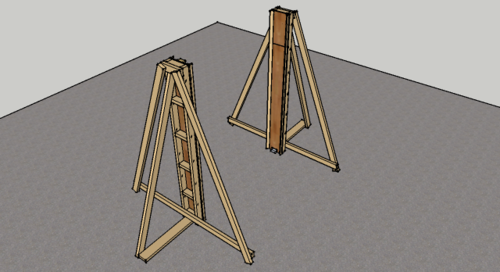
First, I’ll fix two lengths of steel angle to the slab using dynabolts, precisely 2m apart. These will anchor the formwork columns securely to the slab.
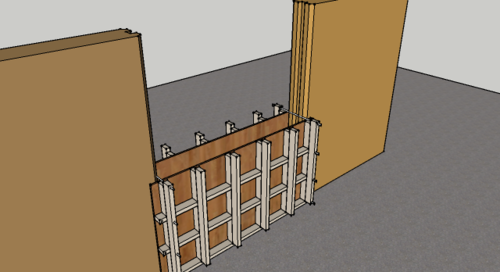
Next, the full height end columns will be bolted to these brackets. The columns are constructed with bracing props in order to plumb the column perfectly. Timber wedges will be used under each “foot” to trim their position and get the columns perfectly vertical. Each column has internal chamfers to produce a nice corner to the wall which will also prevent them being damaged when the forms are removed. It’s hard to see in this picture due to the scale, but the left-most column also has a “tongue” along its length which will form a control joint for the next panel to mate with.
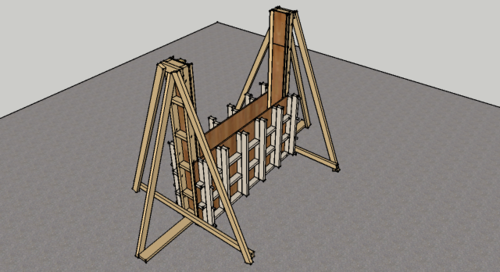
Once the columns are perfectly plumb, the form panels will be attached and bolted up. These are designed with plenty of bracing to prevent them from bulging in the middle but I’ll have to wait and see whether or not they’re strong enough. I think a full-scale test wall may be in order…
Earth is then poured into the forms and rammed in layers of around 15cm. As the wall grows, another set of forms are added above the first until the wall is complete.
Once it’s full height, the forms are removed revealing a beautiful wall panel :)
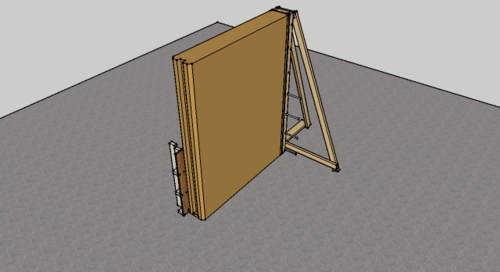
The forms are then reset, leaving a 2m gap and another panel is rammed. The gap between the panels allows the forms to be clamped against both sections without needing the columns to fill in the gap.
I have to give credit to most of this process to Bluey on the BYOHouse forums. It’s only been a week since I signed up there and he (and others there) have shared such a wealth of knowledge and experience and I’m a total stranger! With any luck I’ll be able to contribute my fair share in the next few years too :)
No comments:
Post a Comment